Karl5150
Member
Got my kit Tuesday and promised myself I will take my time and enjoy the build. (I know I will enjoy the completed amp for a long time) I like the inclusion of the voltage and secondary tests early in the process, lets one confirm build and encourages solder joint review practices.
I noticed 2 little things so far in my 6/11/15 manual:
Last instructions on page 26 call for a 2 1/4" black wire from the N on the inlet to 47L, I needed at least 3" just to reach, I used 3 1/2" for a couple of twists with the red wire.
The voltage check on page 27 says to check on 49 and 50, SB 47 and 48.
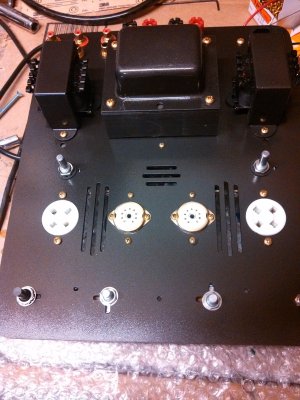
I also noticed the large tube sockets are a VERY tight fit into the panel. A little filing and rubber mallet persuasion were required.
I noticed 2 little things so far in my 6/11/15 manual:
Last instructions on page 26 call for a 2 1/4" black wire from the N on the inlet to 47L, I needed at least 3" just to reach, I used 3 1/2" for a couple of twists with the red wire.
The voltage check on page 27 says to check on 49 and 50, SB 47 and 48.
I also noticed the large tube sockets are a VERY tight fit into the panel. A little filing and rubber mallet persuasion were required.
")