Lowell's Crackatwoa Build Log

larcenasb

New member
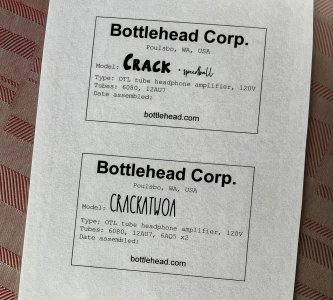
Hello all! There isn’t an abundance of C2a builds on the forum, —not like the Crack anyway—so I thought I’d share my build process here.

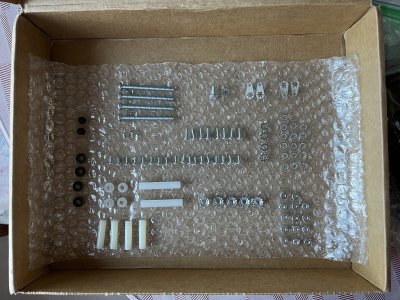
I’m sure others have thought of this, but the one-sided sticky bubble wrap that the kit came with is perfect to hold and keep track of all the screws and other small bits.

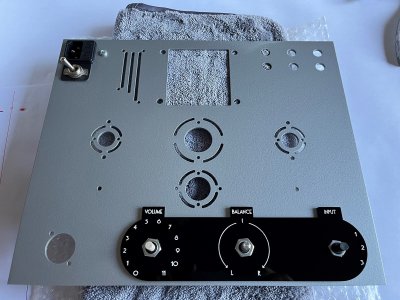
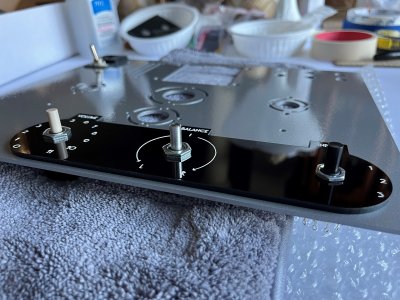
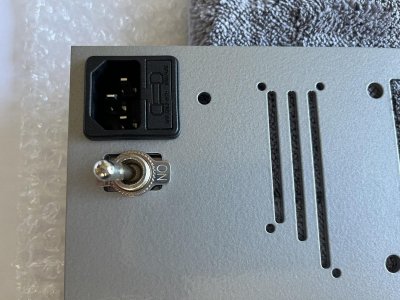
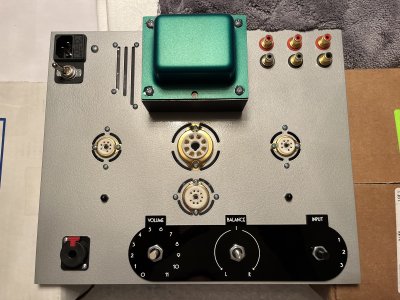
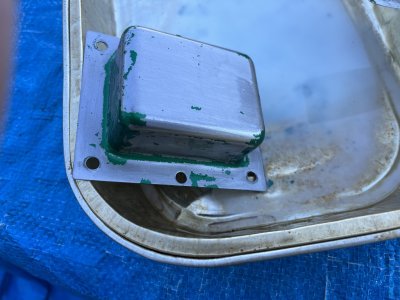
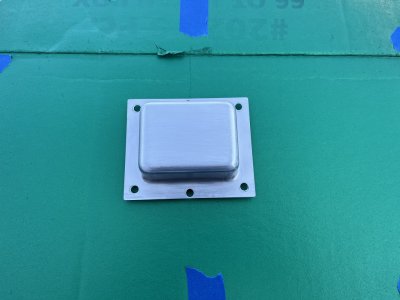
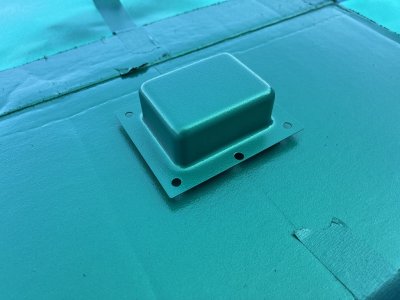
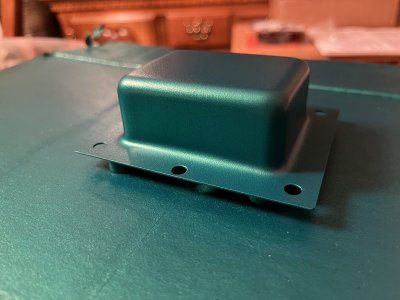
Finished going through the inventory checklist, and then painted the chassis plate (Rust-Oleum Universal hammered silver) and power transformer bell cap (Rust-Oleum Custom matte emerald green). Two light coats, a medium coat, then a heavy coat. It’s been drying for four days now. My emerald green spray paint was spitting the last time I used it, and Doc’s tip in the Bottlehead YouTube tutorial about letting it sit in warm water for a while solved the problem for me. Thanks, Doc!

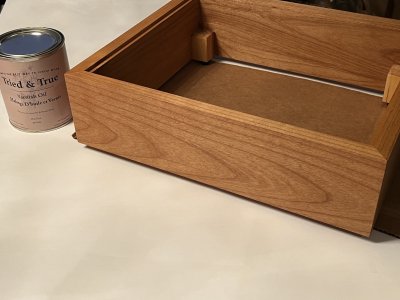
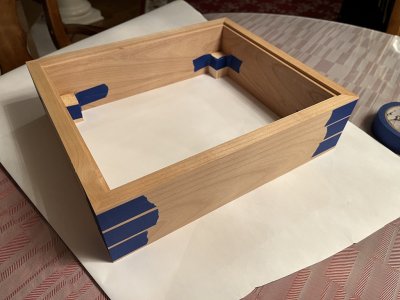
Glued the wood base yesterday and am about to apply the first coat of Tried & True Varnish Oil today—I really like its formula of just linseed oil and pine resin. In the YouTube tutorial, Doc said, “If you have a desire to finish the whole inside, knock yourself out!” I then thought to myself, “Alright, I will!” Haha, this is a labor of love for me and an amp I’ve wanted for a while now. So, I’m trying to—forgive the old phrase—leave no stone unturned, and make this as nice a finished product as I can.
 

Attachments

  • 1 parts checklist.jpg
    1 parts checklist.jpg
    415.4 KB · Views: 33
  • 2 top plate paint.jpg
    2 top plate paint.jpg
    314.1 KB · Views: 49
  • 3 IMG-8323.jpg
    3 IMG-8323.jpg
    247.9 KB · Views: 44
  • 4 IMG-8327.jpg
    4 IMG-8327.jpg
    237.2 KB · Views: 39
Thanks, Paul! Yeah, I was going to spray-paint the bell cap black, but then thought, "Eh, why not give it a little more pop?" I already had the green paint anyway.

Alright, just applied the first coat of the varnish oil. Will wait 1 hour, as the instructions indicate, then will wipe/buff dry. Then after 24 hours, I'll lightly burnish with 0000 steel wool before the next coat. I plan on doing four coats, so not rushing the build process at all.

Also designed some simple badges that will go on the rear of each of my respective amps.

Lastly, I'll share this for fun....got some tomatoes outside and just put in the fire-roasted veggies for my Navy bean soup! Gotta let it slow-cook for a while now. Have a great weekend all, will update this as I move along….the build, not the soup. :)
 

Attachments

  • 5 IMG-8346.jpg
    5 IMG-8346.jpg
    725.8 KB · Views: 51
  • 6 IMG-8322.jpg
    6 IMG-8322.jpg
    1.1 MB · Views: 42
  • 7 IMG-8329.jpg
    7 IMG-8329.jpg
    971.4 KB · Views: 20
  • 8 IMG-8334.jpg
    8 IMG-8334.jpg
    278.6 KB · Views: 18
Just got a message that my custom control overlay is finished! A photo was sent too. Should arrive by the time I'm done with the wood base.

I measured the C2a chassis plate and designed a simple overlay in MS Paint, then found someone on Etsy to laser-cut it out of acrylic. The seller/craftsperson first had to make a computer model/proof with all the correct measurements. This was good as my Paint version was done by eye so is imperfect with regard to proportion and centering. I was thrilled to hear that the text would be done by engraving and then filled with a powder coat, so I shouldn't have to worry about it fading. And the price was $25 for everything, which was definitely less than I was expecting. The first overlay made had an imperfection on the top of the "volume" tab, so the seller made another and is giving me both. I can easily sand that imperfection and the rest of the tabs to make them uniform, and it'll be nice to have a backup.

But yeah, it's really cool to see the idea I had in my head realized. I wanted it to look a little 1930s, so the Art Deco font called "DK Otago" helped a lot with that.
 

Attachments

  • etsy finished product.jpg
    etsy finished product.jpg
    439.5 KB · Views: 38
  • Etsy final model - guide lines.jpg
    Etsy final model - guide lines.jpg
    60.3 KB · Views: 20
  • volume level overlay - my initial rough design.png
    volume level overlay - my initial rough design.png
    215 KB · Views: 31
A nice surprise, the custom control overlay came in today! Was expecting Monday.

I'm very happy with how it turned out. The glossy acrylic gives off some dreamy reflections! It is 1/8" thick, so the stock volume pots would've been too short. I did measure the Audio Note pots and stock selector switch, they're all just long enough. Whew! If they weren't, it'd be no problem sanding down the bottom of the control overlay.

Also, I really like using heavy-duty toggle switches, but needed to find a way to cleanly install it. The cutout for the stock rocker switch is wide enough for the toggle switch to mount securely, but the corners of the cutout are visible. I wanted to use some thick plastic as a rectangular washer to cover it up. So, I cut a piece from an old Blockbuster DVD case that wasn't being used. The case is still usable, just a small amount was cut off it. Then drilled it and cut it to size with some heavy-duty scissors. Things are coming along nicely. :)
 

Attachments

  • IMG-8422.jpg
    IMG-8422.jpg
    619.9 KB · Views: 54
  • IMG-8421.jpg
    IMG-8421.jpg
    606.3 KB · Views: 36
  • IMG-8398.jpg
    IMG-8398.jpg
    304.5 KB · Views: 32
Finished installing the components last night and am ready to solder! Just waiting on the wood base's last coat of varnish to cure. Will work on the soldering little by little each evening.


Attachments

  • IMG-8457.jpg
    IMG-8457.jpg
    3.7 MB · Views: 79
Always nice to see someone going the extra mile on the finish and some customization. Your solution for the power switch works well with the control overlay. Keep the pics coming as you bring it to life.
Karl
 
The control overlay looks good (as does the soup!). Volume up to 11 is a nice touch - "it's one more, innit?"
 
Thank pboser, I love Spinal Tap(!) but I got the idea for the Crackatwoa from Bourney's recent build. A really well-done, recent custom build on the forum here. Cheers!
 
So, I had a bit of a blunder.... just noticed it this morning. When I tightened the screws of the transformer bell cap last night, the paint tore away a bit. Maybe I tightened too much?

I could spot/dab some paint, but I want to do this right. I'll take out the power supply, strip the paint, and re-do it. Then when I screw on the bell cap again, instead of holding each nut and turning the corresponding screw....I'll hold each screw, and turn the corresponding nuts. Hope it'll go well. If any tearing occurs again, it should be more minimal and I could then do the spot/dab painting with a toothpick.
 

Attachments

  • IMG-8463.jpg
    IMG-8463.jpg
    1.1 MB · Views: 50
Hi Natural Sound, yeah, I was wondering how many other builds this has happened to. I did let the paint dry for a week and the can says it fully dries in 24 hrs....so I think it was just the heavy torque.
 
Hi Paul! Yeah, that's definitely the smart approach, and one I'd do on other builds. But as I said before, I've wanted the Crackatwoa for a while and have spent a lot of time imagining how I'd go about the build. I want it to be as nice as I can make it. I can fix this with just a little more time and effort. :) Plus, I've never stripped paint before with mineral spirits (like in that American Restoration show), so it was a good learning experience.

All done, will let dry for two days just to be safe (can says fully dry in 24 hrs), then will tighten the screws carefully--turning the nuts, not the screws.
 

Attachments

  • IMG-8497.jpg
    IMG-8497.jpg
    246.9 KB · Views: 22
  • IMG-8502.jpg
    IMG-8502.jpg
    255.9 KB · Views: 22
  • IMG-8503.jpg
    IMG-8503.jpg
    270.1 KB · Views: 26
Alright, this will test my patience haha. But I've waited so long for this amp, I can wait a little longer. :) Two weeks, will do. Will keep busy with classes till then.
 
Thanks for always being so present on these forums and helping us out, Paul. I really appreciate that. Quite rare really.
 
Back
Top