Lowell's Crackatwoa Build Log

Washering the bell can look pretty good IMO. I swapped the steel machine screws for brass ones on my Cracks, S3X, and Moreplay. I like the contrast it provides and it matches up with the RCA's. I think it would look great with the gold accents on your amp.


Attachments

  • 20211216_182617.jpg
    20211216_182617.jpg
    122.6 KB · Views: 56
  • 20211212_134537a.jpg
    20211212_134537a.jpg
    101.4 KB · Views: 40
Paul, hopefully I'll get there one day! Would love to learn how to powder coat. I can just imagine, I bet you have an awesome workshop. :)

And Mucker, yeah, the washers will be a backup plan for me if the paint still tears. Either that or spot/dab painting. The brass would look nice for my build, but I really like the gold tube sockets stealing the limelight! :)
 
This build is looking very nice.

I really like that Art Deco font and era-appropriate heavy toggle switch. Nice touch.

My rule about paint drying is that if you can still smell it, even a little, then it is not fully dry.

Looking forward to seeing the finished product.
 
Thanks Bourney! Means a lot coming from you, as your build is one of my favorite Bottlehead builds I've seen, and an inspiration for me to build mine. :)

And yes, I'll be sure to wait for the paint to fully dry. Will keep busy and distracted till then. Cheers!
 
Only been three days waiting for the bell cap's paint to dry....eleven more days to go lol. I quickly realized I'm not strong enough to cold turkey the Crackatwoa build process, I needed a little taste...

Good there were a lot of minor things to work on:

First, I worked out the wiring for the output caps. Since mine have radial leads, not the default axial, I needed to route one lead to the other side. I soldered an extra wire for each cap, covered the joints with heatshrink, then hot glued the wires where the velcro straps will be, so the joints won't get stressed. The caps are still to this day 91% off on Parts Connexion (https://www.partsconnexion.com/ASC-81958.html), so only cost about $5 a piece—for that price, any quirks are worth dealing with. Also, 60uF is more than sufficient for my 600-ohm AKG K240 Sextetts.

Next, the Audio Note pots don't have a stopping pin (or orientation pin?), so the pots under the chassis could potentially rotate over time and perhaps ruin the wiring or solder joints. To make sure that isn't an issue, I fabricated side-mounted plates with stopping pins. I cut some hard plastic into shape (from a plastic container lid....it's really stiff) with my heavy-duty scissors and attached one to each pot with industrial-grade double-sided Gorilla Tape. It works very well!

Lastly, I got my solid aluminum control knobs in the mail today, but the selector switch's shaft is a little too thick for them, so I had to drill one knob's hole to make it ever-so-slightly wider. Worked out perfectly. I'll save the photos of the knobs on top for when the amp is complete hehe.


Attachments

  • IMG-8569.jpg
    IMG-8569.jpg
    726.7 KB · Views: 19
  • IMG-8553.jpg
    IMG-8553.jpg
    700.3 KB · Views: 17
  • IMG-8567.jpg
    IMG-8567.jpg
    1.1 MB · Views: 32
  • IMG-8565.jpg
    IMG-8565.jpg
    1.1 MB · Views: 18
Also, I was looking at the wiring of the Crackatwoa and noticed the wiring from the IEC socket to the power switch is different than on the Crack (please see photo). Why is this so? And does anyone know how I would solder the IEC socket to the toggle power switch on the Crackatwoa? L on the IEC would go to which power switch pin? Thanks so much for any help.
 

Attachments

  • C2a pwr switch wiring.png
    C2a pwr switch wiring.png
    10.7 KB · Views: 17
You can use whichever power switch pin you like, as they both kind of do the same thing, just be sure the wire going to the power transformer comes off the lug that you don't use to connect to the IEC module.
 
Thanks for the quick reply, Paul. So, to make sure I understand, regardless of which power switch pin I solder "L" from the IEC socket to, will the "on" side of the switch always be on, or will choosing the wrong pin switch which side is "on"?
 
When you turn the switch on, that connects the two lugs on the power switch together.  Just hook one wire to each lug and it will work as intended.
 
I have some extra time this weekend. Still waiting for the bell cap's paint to dry, but there's no harm in me soldering up the input wires to the bal and vol pots, right? And perhaps the Speedball boards?
 
Awesome, thanks, Paul! I'm off!! I'll try and take it slow though and make sure the mechanical connections and soldering are on point. Have a great rest of your weekend. :)
 
Finished soldering the input wires. I have lots of Mogami and Canare bulk wire, but when I closely examined the Cat 5 cable, I didn't want to replace it! I love its high-quality construction with the blue foil layer and pure copper conductors. And how resourceful to use a network spec cable for an audio amp! I love that, a very Seattle mindset with the repurposing. It also seems like such a flex, the C2a saying to my modded-out Crack, "Use whatever audio-grade or boutique cable you want, you know I'll still sound better." In fact, this whole process building the C2a is kind of weaning me off the desire for boutique parts, and assuring me to trust—as I keep reading about on these forums—the more sophisticated circuit. Another reinforcement of this was picking up the C2a's power transformer...wow is it heavy and all-business. Of course, I did get some boutique parts like the gold tube sockets, Audio Note pots, and some film caps, but that's about it—nothing over the top like with my Crack. I still don't regret that journey, but I do feel as if I'm evolving and wising up with this kit.

I'm trying my best to make good mechanical connections before soldering. In fact, it's been my mantra while doing all the wiring so far, "Make good mechanical connections! Make good mechanical connections!"

Also, I finished building the high-voltage C4S boards. Will work on the low-voltage board during the week. And then the following week, the paint should be dry so I can complete the build. Cheers!
 

Attachments

  • IMG-8591.jpg
    IMG-8591.jpg
    575.2 KB · Views: 28
  • IMG-8587.jpg
    IMG-8587.jpg
    1.3 MB · Views: 48
  • IMG-8585.jpg
    IMG-8585.jpg
    851.8 KB · Views: 30
  • IMG-8573.jpg
    IMG-8573.jpg
    836.5 KB · Views: 30
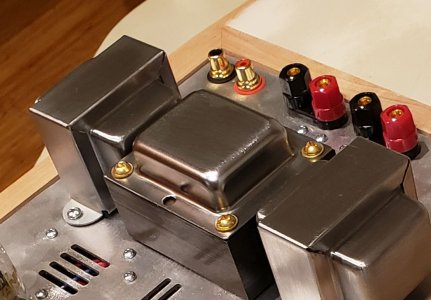
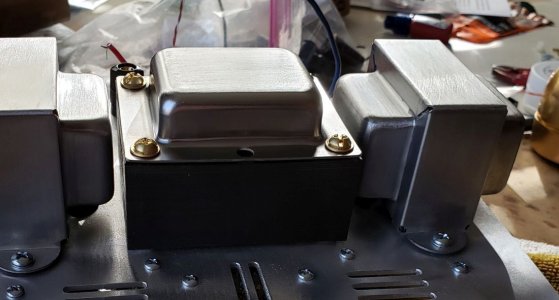
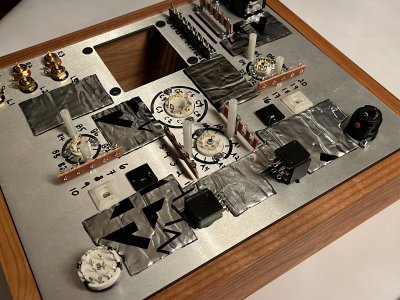
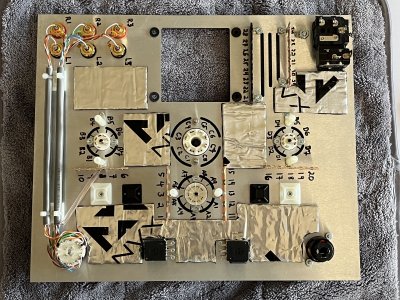
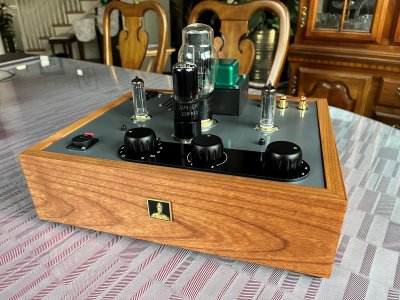
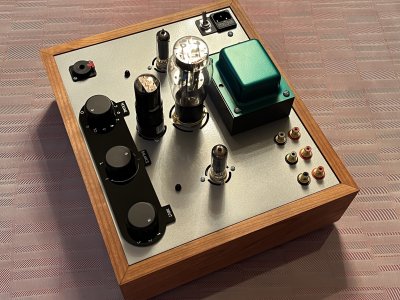
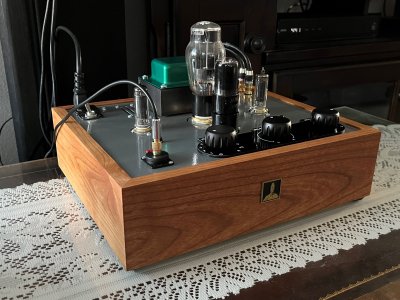
Okay, so I couldn't wait the full 14 days for the paint to dry haha, I waited 11 then decided I'd really like to enjoy the amp this weekend. I was very careful about securing the power transformer to the chassis. Like I said I would do before, I held the screw and turned the nut instead of vice versa. Worked out perfectly; no paint chipping or tearing.

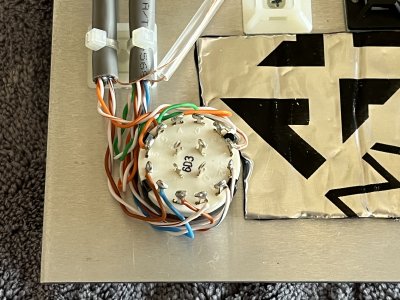
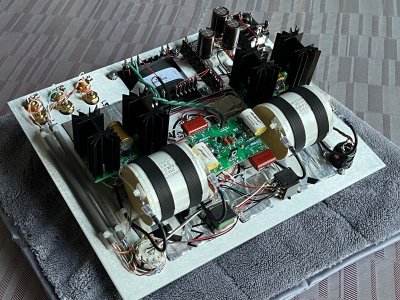
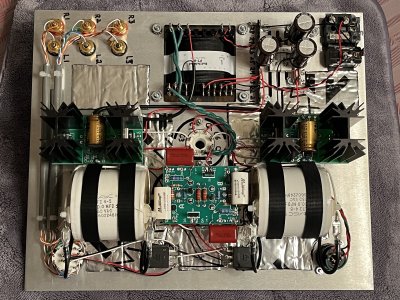
The build was super relaxing and it was a lot of fun planning and carefully routing each wire, though the way I did it made me run out of wire about 4/5 of the way through the build. I used 19AWG Kimber copper wire that I had on hand for the headphone jack because of this.

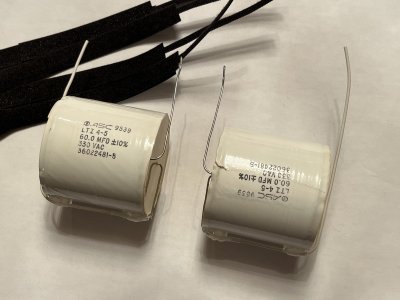
I was originally going to use alligator clips for the output caps for easy rolling, but thanks to Paul (PB), I improved upon this idea. He made it clear that alligator clips aren't the most reliable and could potentially pop off. So, I went with spade connectors—they're both secure and not difficult to detach. Though, I did have to test fit the connectors and use pliers to make the tension just perfect. The cable for the output caps is from an old, standard composite video cable that would otherwise never be used. Glad I could call that benchwarmer into the game after sitting in a dark A/V box for well over a decade. Its flexibility is great for this scenario. Also, I zip-tied these cables to the chassis, so the solder joints won't get stressed when I cap roll.

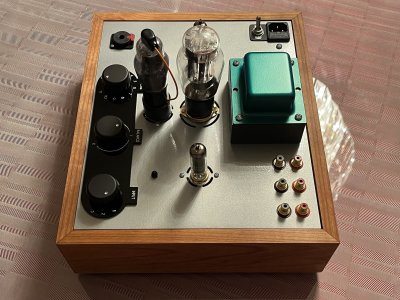
What else can I say? Everything went smoothly....I took my time and tried my best. :) It passed all the resistance and voltage checks, and whoa....

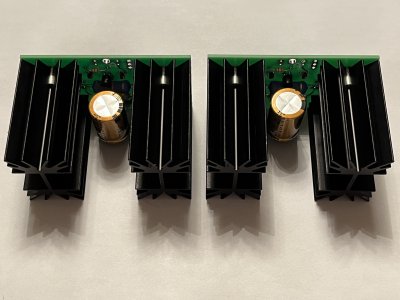
Been listening for a couple hours now....the bass detail and imaging is really getting me excited! Keep in mind, I did A/B compare the Crack and C2a at Bottleheadquarters back in January of 2020. Doing so again brings back a lot of what I remember. The lower registers are more detailed and separated from the mix, and the whole sonic picture has a power and spaciousness about it, but with a sense of ease as well. Similar to what going from a 40WPC to a 120WPC amp did for my inefficient bookshelf speakers.

Tangled Up in Blue by Bob Dylan [HD track] sounds ever more atmospheric—his voice is a little more spaced forward compared to the more closed-in sound of the Crack, and the space around him can be sensed better as well. Same with Nocturn by Kate Bush [vinyl rip], the wind and swooshing sounds seem outside of my headphones. The Sextetts have really good spaciousness, but I haven't heard it anywhere near this level with other amps. And here we go....what it's all about for me, and a good reason why I wanted this amp....to get me closer to this performance....Nirvana Unplugged in NY (DTS track, DVD concert). Pat's guitar is very easy to follow compared to how it gets a bit blurred with Kurt's guitar on the Crack. And Kurt's voice in Come As You Are....man, he sounds so much better here than in the studio version....and the C2a delivers with startling clarity and serious, serious verve.... Kurt's voice grabs my soul as if it were a tangible thing. It has a grip on it and the experience is exhilarating. The C2a delivers all the rasp and all the emotion in his voice, and he's placed very precisely in the soundscape, again with the atmosphere all around him expanded beyond what I'm used to hearing and all the other instruments easy to follow in their precise locations. I'm so happy I discovered OTL amps, they really do drive my 600-ohm AKG K240 Sextetts better than any other amp type I've tried—and the Crackatwoa is a seriously deluxe OTL design. I also tried the C2a as a preamp in my downstairs speaker system with a 6.35mm-to-RCAs cable. The sound projects more into the room, dynamics are greatly improved, the tone overall is very full sounding, and voices especially sound much more full-bodied and lifelike compared to going through just my A/V receiver.

Interestingly, my AudioQuest DragonFly v1.0 is completely silent through the C2a, whereas with every other amp, the USB noise comes through at louder volumes. At max volume with no music playing, the C2a has a bottomless pit of a noise floor. So, it's a USB noise killer along with being a beautiful-sounding amplifier. I'm so, so pleased with this. Also, the Audio Note pot I have is sooooo smooth to use. People often describe weighty pots like butter, but this is more like warm Laffy Taffy haha—the resistance is truly luxurious feeling. Okay, I'm going to go keep listening till the sun rises. :)

Thank you so much, Dan, Eileen, Paul, and Paul, for everything. I'm really, really happy right now. :)
 

Attachments

  • IMG-8640.jpg
    IMG-8640.jpg
    2.9 MB · Views: 41
  • IMG-8714.jpg
    IMG-8714.jpg
    3.1 MB · Views: 34
  • 4.jpg
    4.jpg
    1.3 MB · Views: 52
  • 3.jpg
    3.jpg
    1.5 MB · Views: 28
  • 2.jpg
    2.jpg
    1.2 MB · Views: 44
  • 1.jpg
    1.jpg
    1.2 MB · Views: 70
Some more photos. And one to show that a 6F8G has room to spare beside a 6AS7G, in case anyone was wondering (I was....).
 

Attachments

  • 7.jpg
    7.jpg
    1.3 MB · Views: 37
  • 8.jpg
    8.jpg
    1.1 MB · Views: 25
  • 9.jpg
    9.jpg
    1.2 MB · Views: 30
  • 10.jpg
    10.jpg
    1.2 MB · Views: 26
  • 11.jpg
    11.jpg
    973.9 KB · Views: 49
  • IMG-8643.jpg
    IMG-8643.jpg
    2.8 MB · Views: 57
Back
Top