another Stereomour but a giant step for me

borism

New member
Hi,

I have been reading this forum for a few months and have found it to be a great resource as well as fun to read. My kit arrived about a week ago and I have started working on it. Briefly, I have no experience working on electronics, never have used a soldering iron before and have no woodworking skills to speak of.
However, building my own amplifier was so intriguing that I just had to try. Another disclaimer is that I am well aware that I should be building the original kit but I just could not resist making some substitutions that I have seen mentioned frequently on the forum. Clearly, I am not blaming anybody else particularly when, as possible, I come back for troubleshooting help.

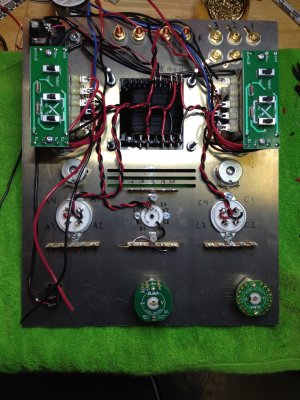
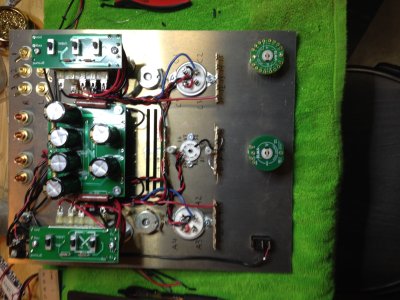
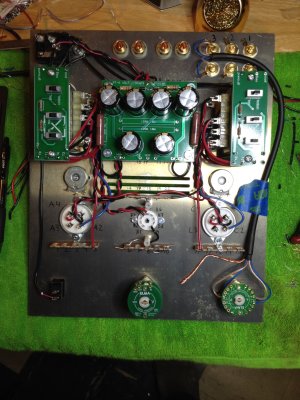
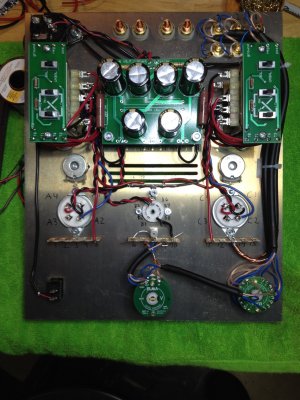
So my upgrades include:
goldpoint selector and stepped attenuator
cardas speaker binding posts
Mundorf coupling, parafeed caps

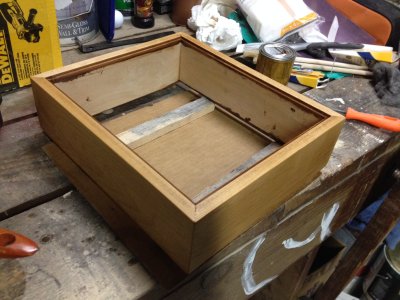
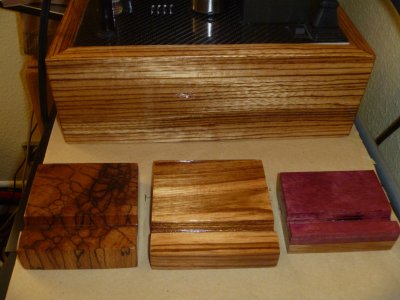
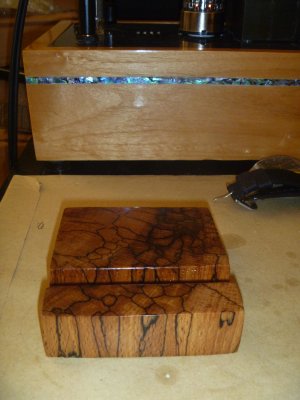
My main issue so far has been, unexpectedly, the finishing of the woodbase. I didn't like the streaky polyurethane finish, so I ended up sanding it down again and starting over.

I hope the images download correctly. If not, I may need some help.

Boris
 

Attachments

  • photo.JPG
    photo.JPG
    726.5 KB · Views: 219
  • photo.jpg
    photo.jpg
    842.6 KB · Views: 261
Boris, I built mine with a Goldpoint attenuator and switch, too. If you need help wiring them, (I did) let me know and I can show you how I did mine. They're working fine.
 
The one step finishes can end up very splotchy and streaky. I recommend using a separate stain and clear coat.
 
Hi Bartguy,
Yes, I think I know the wiring scheme but if you have some pictures or tips it would definitely help.

Doc, I did use a seal coat, then stain followed by polyurethane, but it was just my lack of experience. Now I intend to use shellack spray to see if I can get a smooth finish.

One more photo where things are:


Attachments

  • photo-7.JPG
    photo-7.JPG
    726.5 KB · Views: 119
borism said:
Doc, I did use a seal coat, then stain followed by polyurethane, but it was just my lack of experience. Now I intend to use shellack spray to see if I can get a smooth finish.

The key to poly is multiple thin coats, and sand the finish flat between each coat.  The more layers you add the flatter and smoother the finish will become.  I used four coats i mine, using finer grade sandpaper between each layer.
 
Incrementally adding a little oil based varnish to some wipe on Danish oil or Tung oil gives similar results.
 
Thanks for the tips regarding the wood finishing. I was considering a wipe on poly but ended up using the brush. My poor sanding between coats resulted in the corners being stripped of the stain. That's when I ended up sanding it all down to the wood. Has anyone tried a spray on Shellack? Or, maybe going back to some wipe-on finish is safer?

My progress is somewhat slow, in part due to time limitations. Last night I progressed to the first input wire. You'll note that I installed the power board with the 4 resistors replaced by two Mills 270 ohm (seen on this forum for 2A3 tubes) ones. My thought being less must be better. Also, I decided to replace the input wire with a Mogami 2534 quad cable. The ohm-meter was helpful in sorting and marking the wires (there are 2 blue and 2 clear coated ones). Again, I am indebted to this forum for the idea. I only got the input #3 done yesterday.
 

Attachments

  • photo.jpg
    photo.jpg
    842.5 KB · Views: 188
I have not tried spraying shellac however I do regularly use automotive clear coat/lacquer on wood and have found it works very well if the wood is dry and well seasoned. You can also use a brush to apply I find if I dip the brush in some thinners first then wipe or spin it out so the bristles are only a little damp from the thinners then dip in the lacquer it flows out nicely.

I did these pieces with the clear earlier in the week.
 

Attachments

  • 033.JPG
    033.JPG
    5 MB · Views: 222
Shellac can make a nice finish, but it is actually rather tricky and tedious to do in the best possible way, which is French Polish. It also makes a good filler over which to shoot nitro lacquer as a finish coat - again a whole lot of work.

My suggestion for a relatively easy and foolproof finish is no stain or a good water based stain and then brush or spray coats of a water based clear poly finish, lightly sanding with 220 grit paper between coats.

I don't use a sealer before staining, but I use a water based aniline dye and the penetration characteristics can be different than with oil based stains.
 
Here is my suggestion for a finish:

Start at the bare wood.  Stain to your liking.  Give it a coat of spray Shellac (I have used this often) making a few light coats, 4/0 steel wool in between coats

The shellac seals the wood keeping it from soaking up a varnish.  Then spray light coats of polyurethane for shine.
 
Hi Mark it's Spalted Beech and can be tricky to find with consistent patternation running through it, its one of my favourites and a bit different from the norm.  You can see wha I am making here as well.
 

Attachments

  • 026.JPG
    026.JPG
    4.9 MB · Views: 181
  • 004.JPG
    004.JPG
    4.6 MB · Views: 176
Thanks for all the suggestions.

Jamie, the wood looks beautiful. Let me know if you do some work on request.

Grainger, since I already bought a can of spray shellack, I might as well give it a try. 

Boris
 
Just to clarify, I think Grainger means grade 0000 steel wool. That's about like 400 grit sandpaper. The potential for confusion is that there is not really "4/0" labeled steel wool but there is a grade 4 steel wool which is about like 30 grit sandpaper, i.e. kinda like using aquarium gravel glued to paper.
 
I used the shellack spray can and overall it is much smoother. A few areas had to be sanded down and when that didn't work alcohol did the trick. So, hopefully, with a few coats it will smooth out.

The input wiring is complete. It was tedious but also fun to do.


Attachments

  • photo.jpg
    photo.jpg
    807 KB · Views: 165
Hi,

I need some help.
Well I completed my build, checked the solder joints, did the resistance checks and they were all fine.

Then, I put in the tubes, the fuse and powered it up. The tubes were glowing fine, no blown fuses, so I did the measurements. The AC ones were fine. Then, the DC - all are fine except for 2 terminal strip voltages and 2 active load PC board ones:

Terminal: #2      313
              #14    290

active load PC board:
              OA        317
              OB        291

Can someone tell me, what this may mean. The expected voltages in those 4 locations should all read 165-220.
I am also surprised that it seems so symmetrical.

Thanks,
Boris     
 
Back
Top