Leaking Coupling Cap?

Jamier

Member
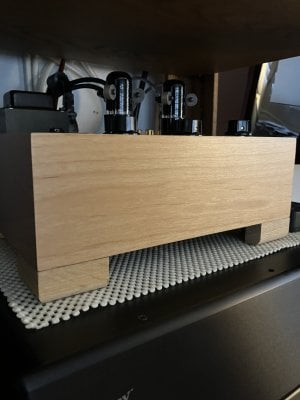
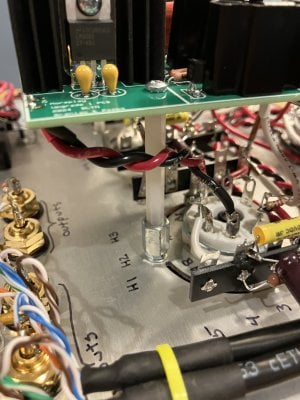
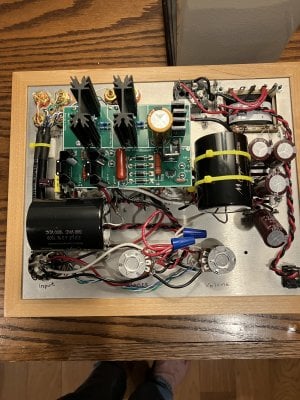
When I installed the upgrade board I also installed V-Cap ODAM 2.2uF/630VDC caps in the coupling cap position. Everything sounds great, but this morning I found some drops of oil under the preamp. When I turned the chassis over I found oil on one end of the A cap. What are the chances? I have never had an oil cap leak so, I am wondering how long before this thing fails and will it be catastrophic when it does?

Jamie
 
I would just let Chris know. While this is exceptionally rare for a new production cap, it is definitely not out of the realm of possibilities, and Chris will definitely stand behind his products.
 
I would just let Chris know. While this is exceptionally rare for a new production cap, it is definitely not out of the realm of possibilities, and Chris will definitely stand behind his products.
Well, these caps are a few years old and they were given to me by someone who had tried them in a DAC and didn’t like them and passed them on to me. They were said to be a matched pair and, indeed, when I measured them, they were identical. So I thought, perfect, matched V-caps, what could go wrong? Well…..

Jamier
 
I have some Mundorf SO 2.2s that I can probably fit in. They are much larger than the Vcaps though. I will need to extend the leads a bit as these cannot go where the Vcaps did. How much additional lead length can I get away with before the performance begins to degrade?

Jamie
 
I have some Mundorf SO 2.2s that I can probably fit in. They are much larger than the Vcaps though. I will need to extend the leads a bit as these cannot go where the Vcaps did. How much additional lead length can I get away with before the performance begins to degrade?

Jamie
I put the Mundorf Silver Oils in for the Coupling Caps, replacing the Vcaps. I ran the Moreplay for several hours. When I turned it off, I have to say those new caps were quite warm. When the one Vcap leaked I summed it up as a one off, but now I am concerned that perhaps it is too hot under the upgrade board to put an oil filled cap. Even the B-cap, which is not under the board, was quite warm.Oh, yeah, I forgot to mention that the one(A) Vcap was mounted under the board approximately in the position that the stock cap would have been bent down to, it’s the one that leaked. So what do you think?

Jamie
 
When you upgrade the Moreplay, the red wire going from terminal 1 to terminal 11 no longer serves any purpose. I recommend removing that wire. Connect the coupling cap on that side to the now empty terminal 1, then run your wire to the claymore board from terminal 1. This will give you a lot more space for your coupling cap. You can also perform this same alteration to the other channel if you'd like.
 
When you upgrade the Moreplay, the red wire going from terminal 1 to terminal 11 no longer serves any purpose. I recommend removing that wire. Connect the coupling cap on that side to the now empty terminal 1, then run your wire to the claymore board from terminal 1. This will give you a lot more space for your coupling cap. You can also perform this same alteration to the other channel if you'd like.
PB, thanks for that advice. The Silver Oils are pretty large so I will still need to elevate (or drop) them away from the chassis but that will get them away from hottest part of the upgrade board. Do you know, roughly, what the temperature is around the heater regulators when the preamp is fully warmed up? I think I’m good below 180 F.

Jamie
 
The heater regulators have it pretty easy in the Moreplay. I would want to double check what the raw voltage coming into the regulators actually is to get a better estimate on the power dissipated by each 1085 regulator, but I'd feel safe saying it's less than 2W. Those same heatsinks handle 3W in the Speedball in a smaller chassis without producing much in the way of heat.
 
The heater regulators have it pretty easy in the Moreplay. I would want to double check what the raw voltage coming into the regulators actually is to get a better estimate on the power dissipated by each 1085 regulator, but I'd feel safe saying it's less than 2W. Those same heatsinks handle 3W in the Speedball in a smaller chassis without producing much in the way of heat.
I moved the cap that was under the board into the position you suggested. I am running it in now and in a couple hours I’ll check the temperature around the Coupling Caps. I’m certain that this will put those caps in a tolerable temperature range. I haven’t installed the new pots yet but I eyeballed the layout by placing the Claymore in its approximate position and I think I’m good to go. Thanks again for your help on this, vey much appreciated.

Jamie
 
I moved the cap that was under the board into the position you suggested.
When you have a chance can you post a picture?

Also, is it possible to install a longer standoff to space the PCB further from the chassis plate? Or will the heat sinks exceed the depth of the wooden base at that point?

I'm asking because I'm probably going to pull the trigger on a Moreplay/S.E.X. 4 combo as a fall project. That area does seem tight if you wanted to use larger caps.

Screenshot from 2025-09-21 13-26-51.png
 
@Natural Sound, I will post a photo when I can but the short story is that I did raise my board by about 1/2 inch. I did it by placing 4-40 coupling nuts right on top of the stock nut and washer. The I cut the threads off a 4-40 x 3/4 screws and joined the provided nylon standoff to the coupling nuts. Then I made some decent feet for the corners of the stock base, raising the whole thing 1 inch.
 

Attachments

  • IMG_0212.jpeg
    IMG_0212.jpeg
    1.7 MB · Views: 22
@Natural Sound, I will post a photo when I can but the short story is that I did raise my board by about 1/2 inch. I did it by placing 4-40 coupling nuts right on top of the stock nut and washer. The I cut the threads off a 4-40 x 3/4 screws and joined the provided nylon standoff to the coupling nuts. Then I made some decent feet for the corners of the stock base, raising the whole thing 1 inch.
@Natural Sound, I will post a photo of the chassis when I shut it down, but others have done this and posted photos. There are many that have done this better, cleaner than I did. I changed and moved these coupling caps so many times that it’s looking a little ugly under there.

Jamie
 
@Natural Sound, I will post a photo of the chassis when I shut it down, but others have done this and posted photos. There are many that have done this better, cleaner than I did. I changed and moved these coupling caps so many times that it’s looking a little ugly under there.

Jamie
@Natural Sound, I forgot to mention that I originally raised the board when I placed the Vcaps in the same location that the stock caps were, I thought I needed the room. In the position they are in now, I don’t think the board needs to be higher.
You can decide when you build it, but this current location is definitely the coolest location I have found, thanks to PB. I’m not sure if these Mundorf Silver Oils would have been a problem in the original, hotter location but, after the leaky Vcap ODAM I decided to play it safe.

Jamie
Here’s how it turned out. Also included a photo of the coupling nuts. If you mount your caps in this location you probably don’t need them.
 

Attachments

  • IMG_0215.jpeg
    IMG_0215.jpeg
    1.7 MB · Views: 17
  • IMG_0214.jpeg
    IMG_0214.jpeg
    2.1 MB · Views: 17
Back
Top