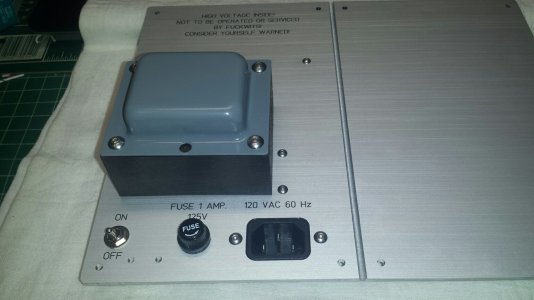
I wish Doc B. would let me put labels like that on certain things...
You are using an out of date browser. It may not display this or other websites correctly.
You should upgrade or use an alternative browser.
You should upgrade or use an alternative browser.
Foreplay III redux Fi edition
- Thread starter Thermioniclife
- Start date
D
Deke609
Guest
But that would have scared me off from diy audio! Then again, being an FW, I probably wouldn't have heeded the warning ;D
Such a label wouldn't be applied to a kitDeke609 said:But that would have scared me off from diy audio!
")
Thermioniclife
Member
We all are fuckwits at times. I still remember when i was about 5 years old and i stuck a wire in a wall outlet.
That was the seminal moment that shaped my misguided life!
Making progress today, will post pic's later. It's been 2 and a half weeks with temps in the upper 80's to low 90's and high humidity.
I'm melting.
That was the seminal moment that shaped my misguided life!
Making progress today, will post pic's later. It's been 2 and a half weeks with temps in the upper 80's to low 90's and high humidity.
I'm melting.
Thermioniclife
Member
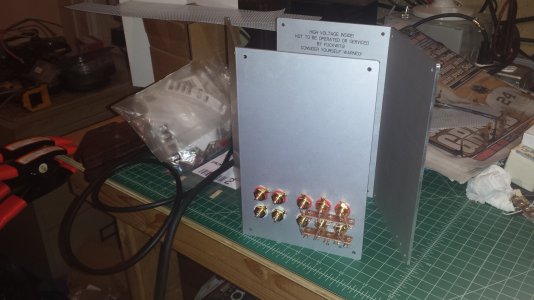
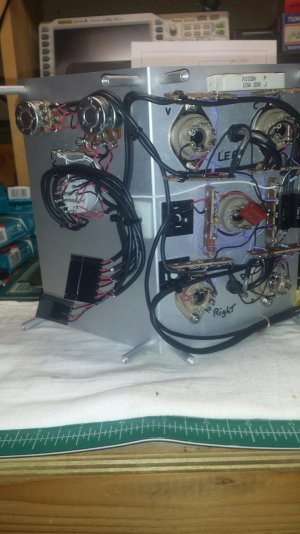
Ok, today's progress.
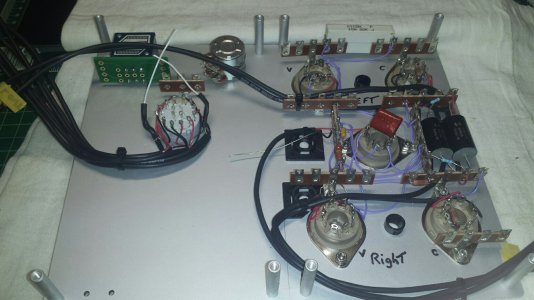
The first pic is the back of the power panel complete. the second pic is the front panel as i progressed today. The tube side is complete except for the grid and plate cap wiring because that will happen after the panel is bent. On the left side i am in the process of wiring the input selector, balance and volume control in which i will then remove once completed and transfer to the input panel for final wiring,
At that point when final assembly occurs all i need to do is secure those 3 control's to the front panel. Hopefully. Hey Bottle head crew, i'm gonna try a 10k balance pot, any thoughts? Peace out all, stay cool and safe.
Attachments
Since the FP-III didn't come with one, you'd need to draw out what you plan to wire up and we could comment.Thermioniclife said:i'm gonna try a 10k balance pot, any thoughts? Peace out all, stay cool and safe.
caffeinator
Member
Outstanding work - this thread is just the thing for the monotony of quarantine (quaranotony?).
Will you enclose the edges to exclude the probing fuckwit fingers, or will this preamp do double duty as something of a fuckwit porchlight/bugzapper?
Will you enclose the edges to exclude the probing fuckwit fingers, or will this preamp do double duty as something of a fuckwit porchlight/bugzapper?
Thermioniclife
Member
Roger that big daddy, i have a couple of in wall spk brackets with perf metal wings that i can use. Gotta find them but i know i have them. i used to be in that business.
Thermioniclife
Member
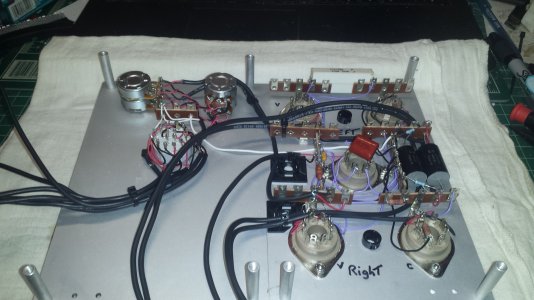
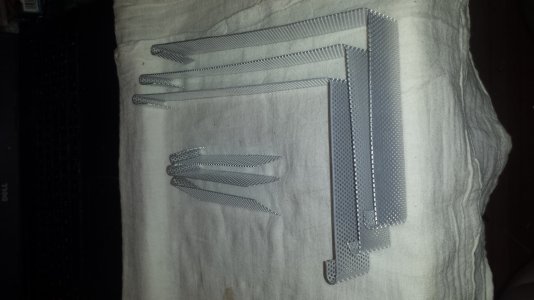
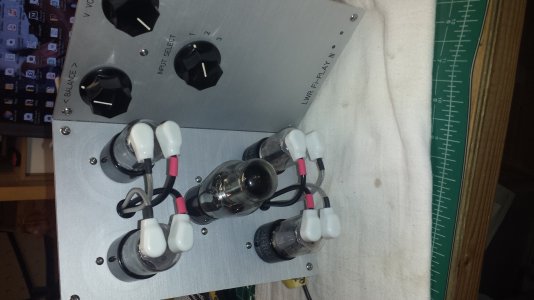
Ok, more progress. I have all the wiring done on the front panel except for the grid and plate wires soldered which will happen in the next day or two, after i bend the front panel. I have cut and bent the F.W. finger protectors, they are ready to install. and lastly the input panel is bent and the input padding resistors are installed. Btw we are in the midst of the first tropical storm of the season, anybody want want to come to the north fork of Long Island N.Y. to pick up some fallen limbs? Hey Doc i heard that lawn care is your side job.
Sorry, i just could not resist. I know, i'm a jackass. Peace, Love and happiness to all.
Sorry, i just could not resist. I know, i'm a jackass. Peace, Love and happiness to all.
Attachments
D
Deke609
Guest
Nice! How did you bend the perforated sheet (aka FW finger protectors)?
Thermioniclife
Member
Roger That Doc, Sorry To here that u Are not available, perhaps i can find someone else. Say hi to Queen For me, Luv you both.
Deke, i bent the F.W. protectors by hand using the last flat(unbent panel) with the standoff's installed and a couple of spring clamps to hold the previously bent corner. Again, P.L.and H to all. I'm out 4 Tonight.
Deke, i bent the F.W. protectors by hand using the last flat(unbent panel) with the standoff's installed and a couple of spring clamps to hold the previously bent corner. Again, P.L.and H to all. I'm out 4 Tonight.
Natural Sound
Active member
Hi Lee,
I'm a reformed Long Islander from Suffolk County. Good luck with the weather event.
Hey I have something cool if you want it (and if I can find it). Bottlehead often presents, "while supplies last" type offers. For example recently a premium RCA 12AU7 clear top was offered with the next X number of Crack kits... That sort of thing. Well years ago when I bought my FPIII the goodie was a Vitamin Q bypass cap for the 0D3. I upgraded to the Extended Foreplay which eliminates the 0D3. Somewhere I have that cap still attached to an octal socket. I no longer have a need for it if you want it. I can also put some NOS 0D3 tubes in the box. No charge to you. I'll even pay for slow boat shipping. Just let me know.
Thermioniclife
Member
Hey Natural Sound,
I got lucky this time, no damage and never lost electricity. Just a bunch of limbs and branches down.
Thanks for the generous offer but you should keep those items, you never know when that cap may come in handy.
Thanks again,
Regards.
I got lucky this time, no damage and never lost electricity. Just a bunch of limbs and branches down.
Thanks for the generous offer but you should keep those items, you never know when that cap may come in handy.
Thanks again,
Regards.
Thermioniclife
Member
Okey Dokey, I am so close to hearing music. Got the front panel completely wired as well as the power and input panels.
All that is left is to hook up the B+ and heater wiring.
All that is left is to hook up the B+ and heater wiring.
Attachments
Thermioniclife
Member
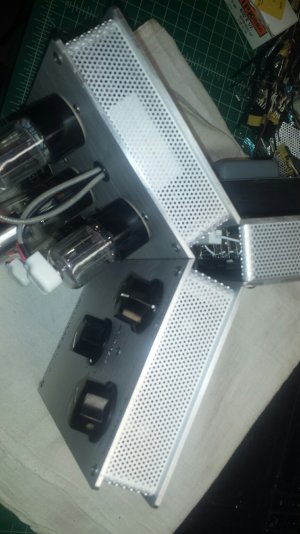
Hey Folks, I know some of you may find this hard to believe but, I AM AN IDIOT!
I finished the wiring and did a resistance check and all seemed fine( i thought)
I then plugged the power in and the monkey flipped the switch. The 0D3 fired up nicely measured 146 vdc on the plates awesome!
then when the tubes started to conduct the B+ dropped out. As it turned out when i ordered the parts i needed i inadvertently ordered 22.1 ohm 1w resistors instead of 22.1k resistors. Lesson learned is that when i did the resistance check i missed the fact that it didn't show that little K after the value. I'm a dope.
So i have an order with Mouser, should receive them on monday. I assembled the chassis and took some pics any way.
I still need to fab the brackets that will hold the feet in place, i guess i should focus on that until Monday
Peace Out.
Attachments
D
Deke609
Guest
BTDT. I can commiserate: http://forum.bottlehead.com/index.php?topic=11138.msg102956#msg102956
Amp looks awesome though!
cheers, Derek
Amp looks awesome though!
cheers, Derek
Thermioniclife
Member
Thanks Derek,
It was a nice challenge to design the chassis plates and associated electronics for this project, it seemed to daunting to me to do so
when i built the Fauxplay III, i decided to build a more traditional design. But i have always liked the look of Don Garbers designs and i am sure i will love this preamp once i get it sorted out.
I may have to build a 2a3 or 300b amp in that style to compliment this preamp.
Regards,
Lee.