You are using an out of date browser. It may not display this or other websites correctly.
You should upgrade or use an alternative browser.
You should upgrade or use an alternative browser.
Current Trio
- Thread starter Adrian
- Start date
")
rickdagless
New member
Wow, sweet set up -- it looks deadly 8)!
You've got me considering a similar finish for my base.
You've got me considering a similar finish for my base.
Adrian
Member
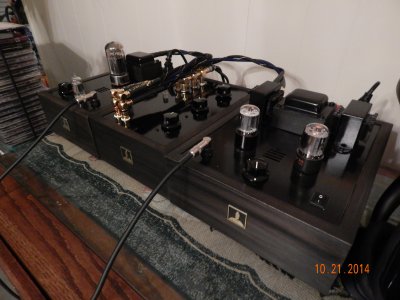
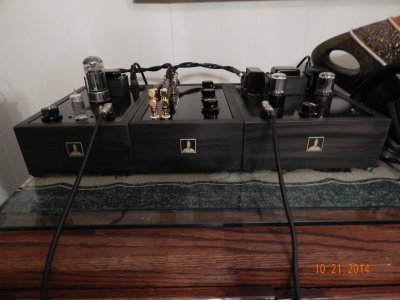
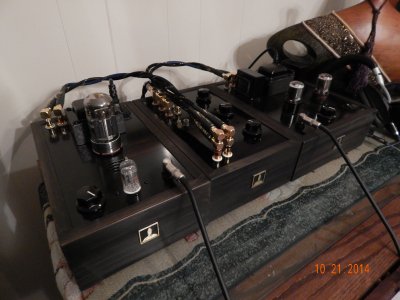
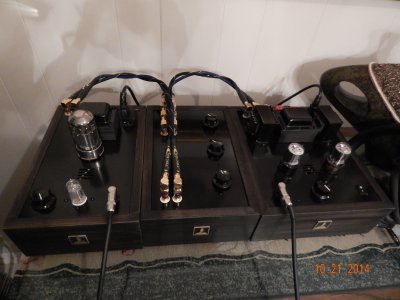
The top plate surface finish is nothing special.
Just a simple "rattle-can" spray paint: Rustoleum Appliance epoxy.
About three thin coats.
Because it is an epoxy made for indoor aappliances it is glossy, super resistant to abrasion and scratches, washable, and easy to clean - just like you would want your fridge door.
Just a simple "rattle-can" spray paint: Rustoleum Appliance epoxy.
About three thin coats.
Because it is an epoxy made for indoor aappliances it is glossy, super resistant to abrasion and scratches, washable, and easy to clean - just like you would want your fridge door.

Grainger49
New member
Just make sure that all ground holes have no paint. It isn't likely but when I did my Eros top plate there was spatter through some holes.
Grainger49
New member
I'm concerned about the holes on the underside of the top plate having some paint around them. A number of the grounds are made there. If there is no paint on the underside don't worry.
Adrian
Member
Before I installed the hardware I made sure (both top and bottom) I had good contact with the metal plate. I carefully scraped paint where metal-to-metal contact would occur (e.g., external ground).
Frankly, I paint the top plate before assembly, scrape where appropriate, assemble the hardware, mask off where needed, and repaint.
Frankly, I paint the top plate before assembly, scrape where appropriate, assemble the hardware, mask off where needed, and repaint.
rockdrummer
New member
How did you do those bases? I really like that look.
Ben
Ben
Adrian
Member
The bases are finished with Rustoleum EBONY stain.
I prep the wood with 220 grit, 00 steel wool, and a tack rag.
I then use a cotton rag and wipe on the stain. It goes on solid black. I do one side at a time.
After the stain has set for a couple of minutes I then take a clean cotton rag and gently wipe off the "excess" stain wiping in one direction.
You could practice this on another piece of wood to get a feel for how hard to press and how much to wipe off.
Usually it only takes a couple of wipes per side to get the desired effect.
You can wipe more off leaving a real ebony wood finish (compare your result with a picture of ebony wood you like) or leave some on like I did to give a darker overall look.
Practice with it and you will find it is easy and fast.
rockdrummer
New member
Thanks so much for the response! I went back and forth between painting the top plate, not painting it, etc. I will paint the bell and chokes. So I decided to search to see what a "blackout" piece would look like. Took all of 30 seconds to find your gear. I love the all black look. Decision made! Thanks again,
Ben
Ben
Great looking trio! My Reduction, Smash and Stereomour all have black powder coated base plates and red top caps for the power supplies. I used Aniline red stain from Lee Valley on the bases. Wondered how the bases would look as black and you have answered! They look great!
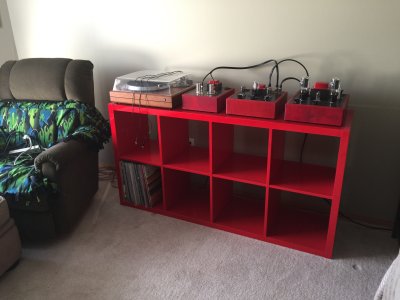
I recently made a trip to Ikea in Edmonton to pick up a bright red Kallax storage unit to use as a stereo stand. I love the look but when I look at the turntable base I think: "Paint It Black".
I recently made a trip to Ikea in Edmonton to pick up a bright red Kallax storage unit to use as a stereo stand. I love the look but when I look at the turntable base I think: "Paint It Black".
Attachments
Similar threads
- Replies
- 20
- Views
- 323