Crack Resistance Check before Voltage Check

adeep42 said:
Although my music tastes might be a tad different than yours (although I do listen to quite a lot of classic rock and some very contemporary), your description of the Crack amp is on the money. If you go the Speedball route, you're in for another blown away moment.

A

I've thought about it since listening and I'm scared to change this at all ! :D

I'm going to enjoy the stock Crack experience for at least a month before upgrading.

44Hxxde.jpg


COTiDNb.jpg


uyLf43O.jpg


0jdzp50.jpg


nkzogl7.jpg


PNv3Ro2.jpg


pTZbxxq.jpg


Ar60kDp.jpg
 
I listened about a month before I did the Speedball upgrade, however I did order the Speedball with the Crack so I really had to do it. Dude, it was worth it.
 
adeep42 said:
Although my music tastes might be a tad different than yours (although I do listen to quite a lot of classic rock and some very contemporary), your description of the Crack amp is on the money. If you go the Speedball route, you're in for another blown away moment.

A

My choices were very limited for testing because it was hooked up to my cable box :X. You won't find any of those musicians on my PC, I promise you.

The Crack is magic.
 
adeep42 said:
I listened about a month before I did the Speedball upgrade, however I did order the Speedball with the Crack so I really had to do it. Dude, it was worth it.

I bought them together as well. I was expecting to be let down by the solo Crack.

Holy cow.
 
Aside from the resistance check confusion, the instructions for the build were really fantastic.

Very easy to follow. My A.D.D. did not stop me from building this without a single issue throughout the whole process; from soldering, to resistance, voltage and then listening. :D

Question --- I was at Home Depot the other day to pick up alligator clips for my DMM and picked up Gorilla Glue on the way out. It's the multipurpose kind... and not the wood glue.

Is this really not the right way to construct the case?

I saw a post saying that it expands a lot, but I really want to get this tape off the wood.
 
Build is very neat, well done. Standard white wood glue is fine. As you are gluing two end grains together at each corner that helps with the strength of the joint. Try not to get any seepage onto the outside of the case as this tends to seal the grain and will make for a patchy finish if you use stain. It's water based so can be wiped off with a damp cloth. A light sanding first is a good idea anyway and you may need to do that to remove tape marks.
 
Deluk said:
Build is very neat, well done. Standard white wood glue is fine. As you are gluing two end grains together at each corner that helps with the strength of the joint. Try not to get any seepage onto the outside of the case as this tends to seal the grain and will make for a patchy finish if you use stain. It's water based so can be wiped off with a damp cloth. A light sanding first is a good idea anyway and you may need to do that to remove tape marks.

Is it weird that I want to glue them together and then sand it down? I was hoping for a semi-rounded edge finish.
 
Your multi purpose Gorilla Glue will be fine it has the advantage of filling small gaps as it will foam during cure it cleans off easily and will also take a stain.
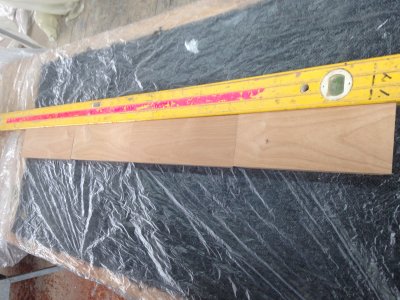
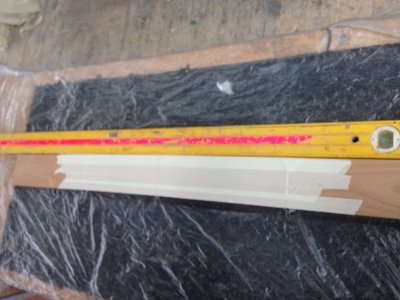
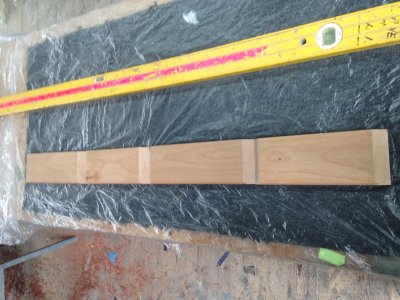
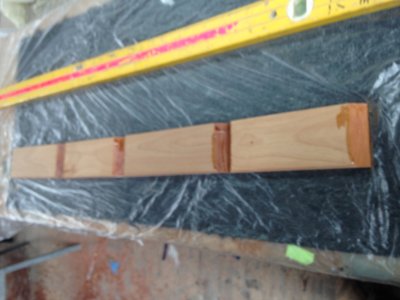
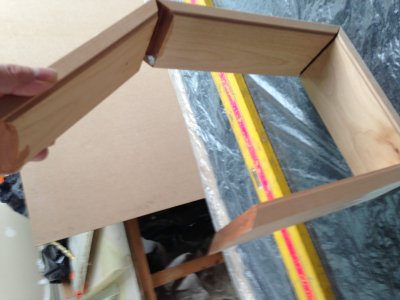
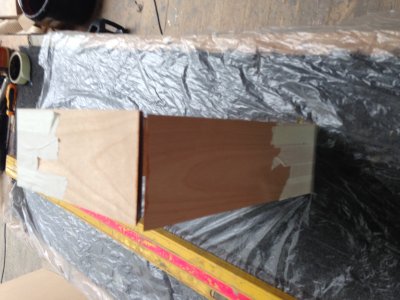
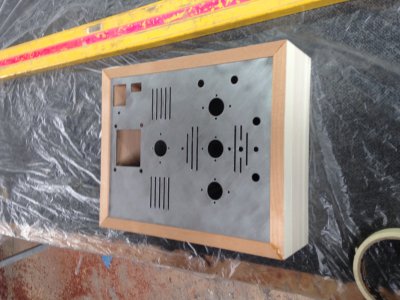
I glued up my Eros enclosure this today and it took no more than five minutes (I've made a few now). My tip for you would be to do it on a flat surface and be sure to glue it up on some plastic sheeting a cut up bin liner works well and this way the enclosure wont stick to your table.

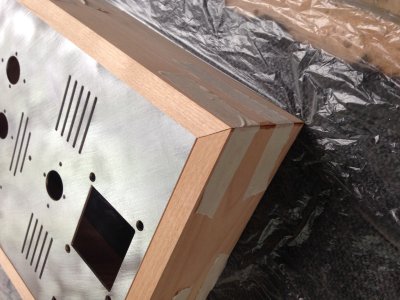
Here are a few pics of the process I used the alloy top to check for fit and squarness.
 

Attachments

  • IMG_4555.JPG
    IMG_4555.JPG
    2.3 MB · Views: 25
  • IMG_4556.JPG
    IMG_4556.JPG
    1.6 MB · Views: 23
  • IMG_4559.JPG
    IMG_4559.JPG
    2.2 MB · Views: 21
  • IMG_4563.JPG
    IMG_4563.JPG
    1.5 MB · Views: 22
  • IMG_4564.JPG
    IMG_4564.JPG
    1.5 MB · Views: 26
  • IMG_4567.JPG
    IMG_4567.JPG
    1.8 MB · Views: 27
  • IMG_4568.JPG
    IMG_4568.JPG
    2.1 MB · Views: 27
  • IMG_4569.JPG
    IMG_4569.JPG
    1.8 MB · Views: 402
JamieMcC said:
Your multi purpose Gorilla Glue will be fine it has the advantage of filling small gaps as it will foam during cure it cleans off easily and will also take a stain.
I glued up my Eros enclosure this today and it took no more than five minutes (I've made a few now). My tip for you would be to do it on a flat surface and be sure to glue it up on some plastic sheeting a cut up bin liner works well and this way the enclosure wont stick to your table.

Here are a few pics of the process I used the alloy top to check for fit and squarness.

Very clever. I like the way you taped up the entire edge, preventing any glue from seeping through.

Will it be okay to do staining and whatnot after glueing it all together?

I plan on creating the rustic, reclaimed look. I love that old, almost charred look. 

Exactly what kind of wood is this? Is it that pressboard stuff? If I do sand it, will it dissipate quickly or will I be okay?
 
PU glue will stain your skin, so be careful to clean it off your fingers. I prefer Titebond regular or premium (not polyurethane) wood glue. It's maybe not as strong, but seems strong enough and doesn't blow out of the seams like the urethane glue does. If you do use the urethane glue be sure to dampen the wood with a damp rag before you apply the glue. It will make the joint stronger. And do be sure to wipe any ooze off the outside with a damp rag.

The wood is not "that pressboard stuff". The bases are custom milled for us out of locally harvested alder by Harmonic Design Works of Bellingham, WA.
 
Yes as Doc says don’t get any of the polyurethane glue (gorilla glue is just a well-known brand name for it) on your fingers it can/will stain them a black colour which will not wash off!. The PU glue is moisture curing if you’re in a hot dry place or need to speed the cure up a wipe over the joint to be glued with a moist rag will speed the cure up and is a handy trick.

You also only need a very very *FINE* smear of glue on each joints surface otherwise it can/will get messy quick. On the plus side it is strong and any excess can easily be cleaned up with sand paper or a sharp chisel after its cured. Covering the exterior side completely with masking -tape goes a long way towards getting tight joints and not letting any excess glue escape onto the exterior of your enclosure. Don’t forget to take the alloy top off the enclosure after you have used it to check for square-ness or it might get stuck to the wooden enclosure.

I use the PU glue quiet a bit as it will stick to almost anything.
 
Right on. Thanks for the tips guys.

I ended up moving forward with Gorilla PU Glue last night using tape to cover all visible edges. It came out great.

I made sure the bottom was perfectly aligned while sitting down to dry. Sadly, not all 4 pieces of wood are equal heights so I'm going to have to sand it down a bit so that it looks flush.

What sandpaper is recommended for this project? I thought I read 180 and then 220 but I'm not sure. Thanks :P

Also, should I sand it by hand?

 
Back
Top