Really nice work, Aaron. Thanks for sending pictures along. I've added them to the gallery along with a write-up I synthesized from some of your posts.
I used 3L to headphone jack ground wire. An "old" trick was to cut insulation and rather than pull it off just separate it wherever wire was needed. In this manner I was able to connect the diodes to ground and their respective terminals without use of the normal 12AU7 socket center terminal.
Good work, as usual, Aaron.
Jameson, I had planned on asking to see photos of your work, noting you have built a number of kits in a short period of time. Just followed the link- nice builds and photos.
Karl
Good work, as usual, Aaron.
Jameson, I had planned on asking to see photos of your work, noting you have built a number of kits in a short period of time. Just followed the link- nice builds and photos.
Karl
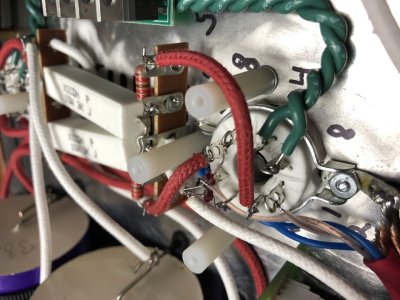
") If you don't use all three it gets "wonky".
If you don't use all three it gets "wonky". 