stevenally
New member
This was my first Bottlehead project.After nearly 40 years of high powered Solid State stereo I have started to put together a tube set-up to listen to vinyl.A Pro-ject turntable with Pro-ject preamp will go through the Quickie to a Dynaco 70 (current rebuild project) to a pair of Magnepan MC-1 speakers. Bass is provided through a Hsu Research sub.
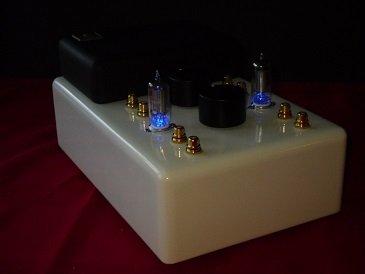
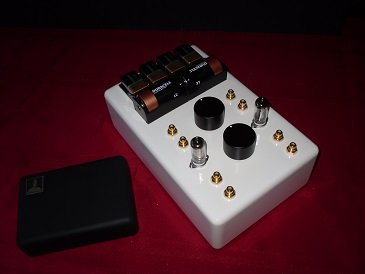
The Quickie went together without a hitch,thanks to the excellent instructions provided.I did make a few minor changes/upgrades to better fit my system.A second pair of outputs was added.The stock potentiometer was replaced with an Alps unit.Caps were replaced with ClarityCap ESA's.Wiring was all .999 silver with cotton sleeve.Stock knobs replaced with larger aluminum ones.(What can I say, everybody likes a big set of knobs.)
As far as the cabinet I opted for a clean, one piece look as opposed to a separate faceplate/box.Also a cover was constructed for the batteries.Everything is MDF with multiplecoats of primer/filler,sanded with 1200 paper,and a base coat/clear coat finish.After trying and rejecting several options for a power indicator I settled on a pair of LEDs uplighting the tubes.The blue glow is a nice compliment to the Dynaco's glow.
The pictures show the tubes provided with the kit, used for testing and initial power up. A nice set of NOS Telefunken tubes will soon be installed for burn in.(Early Christmas present from a friend travelling in Europe.)