While I have a lull between tweaking the Crack with some upgrade parts and putting in the Stereomour upgrades, I decided to do a little cosmetic work and etch small nameplates for each project I've built. I figured I'd share my process in case it's interesting to anyone else.
Here's the list of tools and materials you'll need:
Ok, now on to the process.
[list type=decimal]
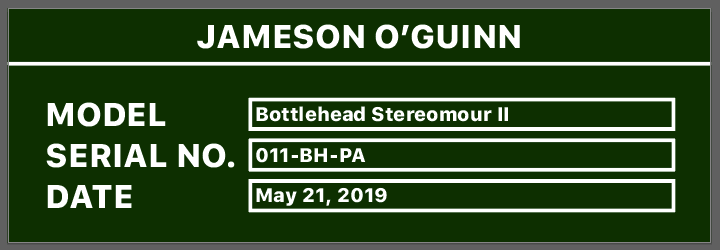
[*]I designed what the tags looked like in Adobe Illustrator. I made the background a dark green (a suggestion from the transfer paper manufacturer) and the text white, then flipped everything so it was backward.
[*]I printed the tags on the transfer paper. Give yourself a little space so you can fit a ruler between each tag without touching the ink or it'll scratch.
[*]I cut out each tag and paired it with a blank. My blanks had a brushed side and a bare side. If you have both, put the transfer against the bare side. Despite sanding I could never get the brushed side bare enough to etch.
[*]I prepped the following: a tub of cold water, a tub with acid (plastic worked, but pick something you don't care about), and a tub with warm water and baking soda mixed together.
[*]This is where I experienced the most frustration. Because the tags were so small, it was difficult to get the transfer paper and the blank fed into the laminator together. I ended up using a piece of regular white paper as a sleeve since it was thin enough to allow the heat to pass through.
[*]I passed the blank and transfer paper through twice, then immediately plopped them in the cold water bath for a couple minutes until the transfer paper backing came off by itself.
[*]I dried off each blank and covered the back side with packing tape to keep it from etching. It apparently also keeps the acid from overheating or something, I'm not a chemist. Leave a little tape so you can have something to grab onto with tongs or tweezers.
[*]I carefully dropped the tags in the acid and let them sit for 30 minutes. I agitated the tub of acid every 5 or so minutes to keep the etching surface bare.
[*]I pulled the tag out by the tape with some pliers and dropped it immediately into the baking soda and water solution to stop the reaction.
[*]After a little while I pulled the tags out and let them dry. Then I scrubbed the transfer off with a coarse kitchen sponge.
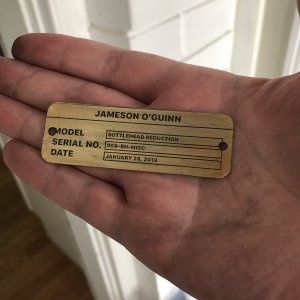
[*]Finally, I rubbed the entire surface pretty hard with an infill paint pen. This took a little trial and error, but I found sanding in one direction lightly with a high grit paper removed the surface paint and left the infill alone. Then I cleaned them slightly and sprayed them with a clear coat.
[/list]
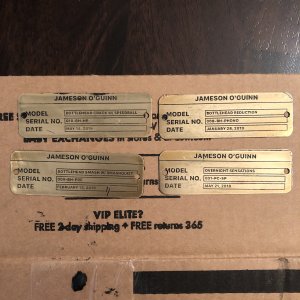
Overall I'm very happy with how they turned out. They're imperfect, which is great since my amps are also.
Here's the list of tools and materials you'll need:
- A laser printer. It CANNOT be made by Brother, at least not if you use the transfer paper I did. It has something to do with the toner.
- Transfer paper. I used this stuff that is made for PCBs.
- A laminator. It has to have enough pressure and heat to melt the toner and press it to the board. The transfer paper manufacturer recommended one, so I got it.
- Ferric chloride acid. (That's for brass and copper, you'll need a different acid for different materials)
- Brass etching plates. I got mine here.
- An infill paint pen.
- Three tubs, water, baking soda.
- Xacto knife, ruler, high-grit sandpaper.
Ok, now on to the process.
[list type=decimal]
[*]I designed what the tags looked like in Adobe Illustrator. I made the background a dark green (a suggestion from the transfer paper manufacturer) and the text white, then flipped everything so it was backward.
[*]I printed the tags on the transfer paper. Give yourself a little space so you can fit a ruler between each tag without touching the ink or it'll scratch.
[*]I cut out each tag and paired it with a blank. My blanks had a brushed side and a bare side. If you have both, put the transfer against the bare side. Despite sanding I could never get the brushed side bare enough to etch.
[*]I prepped the following: a tub of cold water, a tub with acid (plastic worked, but pick something you don't care about), and a tub with warm water and baking soda mixed together.
[*]This is where I experienced the most frustration. Because the tags were so small, it was difficult to get the transfer paper and the blank fed into the laminator together. I ended up using a piece of regular white paper as a sleeve since it was thin enough to allow the heat to pass through.
[*]I passed the blank and transfer paper through twice, then immediately plopped them in the cold water bath for a couple minutes until the transfer paper backing came off by itself.
[*]I dried off each blank and covered the back side with packing tape to keep it from etching. It apparently also keeps the acid from overheating or something, I'm not a chemist. Leave a little tape so you can have something to grab onto with tongs or tweezers.
[*]I carefully dropped the tags in the acid and let them sit for 30 minutes. I agitated the tub of acid every 5 or so minutes to keep the etching surface bare.
[*]I pulled the tag out by the tape with some pliers and dropped it immediately into the baking soda and water solution to stop the reaction.
[*]After a little while I pulled the tags out and let them dry. Then I scrubbed the transfer off with a coarse kitchen sponge.
[*]Finally, I rubbed the entire surface pretty hard with an infill paint pen. This took a little trial and error, but I found sanding in one direction lightly with a high grit paper removed the surface paint and left the infill alone. Then I cleaned them slightly and sprayed them with a clear coat.
[/list]
Overall I'm very happy with how they turned out. They're imperfect, which is great since my amps are also.