Voltages 1/2 [resolved]

I reheated both MJE5731. I also made a continuity test between the center of MJE5731 and terminal 7 and there is good connection, please see image.

DC V at terminal seven still 407.

Thanks
 

Attachments

  • IMG_2004.JPG
    IMG_2004.JPG
    472.7 KB · Views: 118
I just checked with both12A7's and voltage is the same. However the voltage is now 440 rather than the 407 that I was getting a couple days ago. I have done nothing to the amp.

Thanks
 
12V over 366 Ohms is 32mA, which is way off target. 

Can you carefully check the DC voltage on pin 7 of the offending socket? 
 
I have zero voltage, please see image

Was I correct in measuring resistance of pin 8 against the center pin? Or should I have done it against something else?


Attachments

  • FullSizeRender(1).jpg
    FullSizeRender(1).jpg
    569.7 KB · Views: 116
Paul, thanks for all your help. I am leaving on a three week long work trip, I will reach out as soon as I come back..
Hector
 
Hi Paul,

I am back from a ver long trip and ready to tackle this. You say the red wire is not in the correct terminal, can you tell me which of the two red wires ypu are talking about? A or B? Again thanks for all your help.

I checked A and as per page 48 should be connected to 7L and B6, which is as it is.

I also checked B and as per page 41 shpuld be attached to "lug closest to the chassis plate in the center of the volume potentiometer" and the other side to 10L, which is where they are now.

Are you talking about a different red wire?


Attachments

  • Red Wire A or B.PNG
    Red Wire A or B.PNG
    1 MB · Views: 109
Sorry, it's been about a month since I posted that, and I don't see any errors.  There is something pretty wonky going on here, you have 12V at the cathode of the offending side, the correct resistor in place, and 440V on the plate.  This doesn't jive with the curves for a 12AT7.

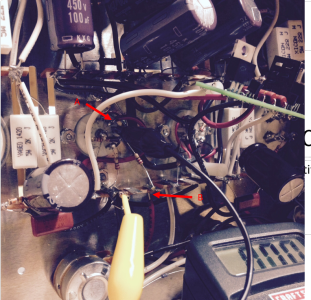
This leaves us at flaky solder joints, which is very likely your issue.  You can also swap the connections at OA and OB, and if the offending voltage stays put, then you know the C4S board is working.

-PB
 
We received this amplifier in today, and a solder joint on the center lug of one of the 9 pin sockets was not flowed all the way.  Upon resoldering this connection, the amplifier works properly.

-PB
 
Back
Top