Steampunk Crack

TomS68

New member
Pics of a recently completed Crack build.

Tom Stanley
General Manager Cables For Less


Attachments

  • IMG_1944.JPG
    IMG_1944.JPG
    117.7 KB · Views: 303
  • IMG_1942.JPG
    IMG_1942.JPG
    106.8 KB · Views: 168
  • IMG_1827.JPG
    IMG_1827.JPG
    171.3 KB · Views: 142
  • IMG_1924.JPG
    IMG_1924.JPG
    94.4 KB · Views: 154
  • IMG_1954.JPG
    IMG_1954.JPG
    117.6 KB · Views: 130
Hey Tom568,

That's very striking - love it!  Please post another pic or two, and, if you wouldn't mind, how did you get that effect on the top plate?  From what wood did you make the base?

Beautiful work!
 
That is a taller cabinet I had made using one inch thick quartered oak and 1/8 inch copper plates (three of them, top, front and back.)  The top plate alone weighs two pounds, this is not a light amp. I finished the cabinet with golden oak Danish oil and carnauba wax. The patina on the copper plate was done with ammonia and sea salt and then sealed with a clear finish. I built a headphone rack to match using the  steampunk theme, copper pipe, brass and gears. Note I used dual Alps single ganged pots for separate left and right volume control, dual vu meters, etc. All cables plug in the back and the headphone jack is on the right side.  I also modified some California Headphone Silverado headphones by upgrading the drivers to 250 ohm and changed them from closed to open. I did all work except for wooden cabinet construction, I lack the saws and router needed.

It may not look it but I have a large opening under the brass gears as a vent hole, and the open area is a bit larger than the original from head dissipation. I am building a second crack that will have shiny copper and the exact same plate and control setup as well as the VU meters. Top plate is standard size, front and back plates are four inches square and I have room on the back plate to do preamp outputs. I need to clean up the wiring on the inside before I post photos but I redid a lot of the wiring using Belden shielded cable and 14 awg ground wire between the plates. I drilled into the underside of the copper for proper grounding. I can build a standard crack amp in about five hours (just wiring, not cabinet finish) but all the extras probably put my total build time at about 15 hours. It is good to know this since I have a few requests to build more of these for family and friends.

Tom Stanley
General Manager Cables For Less
 

Attachments

  • IMG_1886 (1).JPG
    IMG_1886 (1).JPG
    138.8 KB · Views: 124
  • IMG_1895.JPG
    IMG_1895.JPG
    120.4 KB · Views: 133
  • IMG_1917.JPG
    IMG_1917.JPG
    128.1 KB · Views: 129
Very nice work and a well controlled patina! Did you use a plastic bin for the fume chamber? How many hours did you let it set if you don't mind my asking?
 
Hi Tom,

Thank you very much for posting the additional images and details - excellent work and a fantastic look - no wonder family and friends are after you to build for them! I am looking forward to seeing the wiring pictures and how you've implemented the meters.

Btw, where have you been able to find gears and mechanisms?  I've got another steampunk project (clock) on the back burner because I am having trouble finding bits like that.  Reproduction items are easy to find, but are merely cosmetic and look like phony reproductions.

thanks,

David
 
First question....

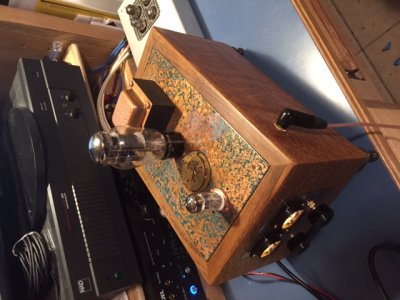
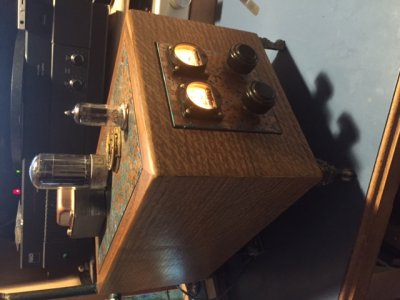
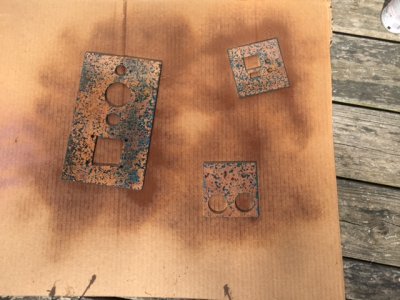
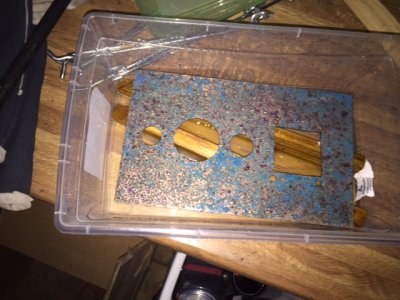
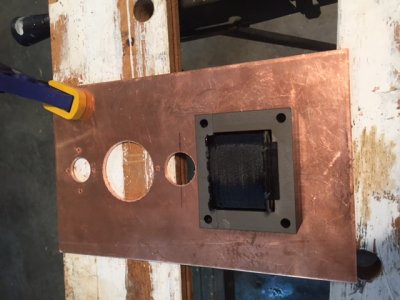
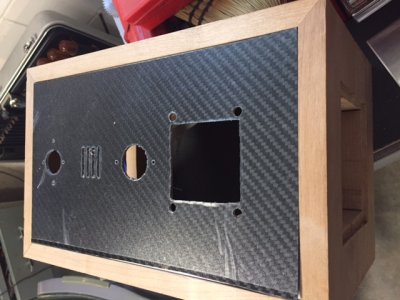
I did use a plastic fume chamber and I let the copper sit over night, roughly 10-12 hours then I merely washed off any excess, waited for the surface to dry thoroughly and sprayed with a clear indoor/outdoor Krylon spray. In adding patina, you have to worry very little about surface scratches, the patina erases them. The biggest issue was cutting square shapes in 1/8 inch copper plate. I know it is supposed to be a soft metal but when you have this thickness, it does not seem so soft lol. The top plate weighs 2 lbs and does not move or bend in the least compared to say aluminum of a lesser thickness. I achieved more of a blue finish with ammonia, with vinegar I believe you get more of a green hue. My second copper build will be polished copper and trust me it will take much longer to buff out all scratches.

second.....
Basically for this project I bought most everything on ebay. 1/8 inch copper plates, 6x10 and 4x4 inches ($57) per set and thus far I have three sets. I did not have to cut any copper plate to size, my exact sizes needed were on Ebay (Metalremnantsinc)

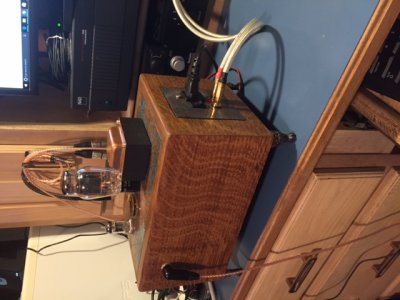
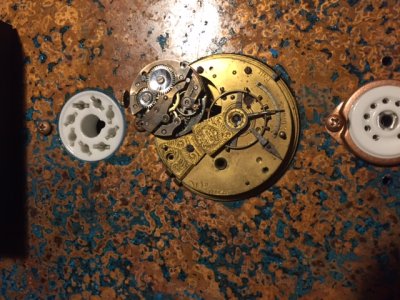
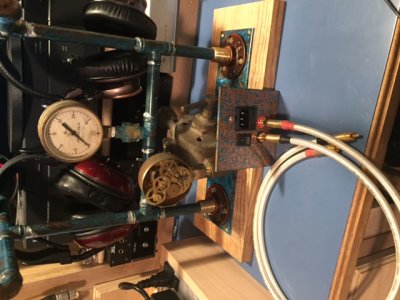
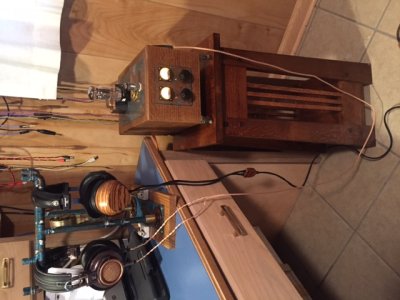
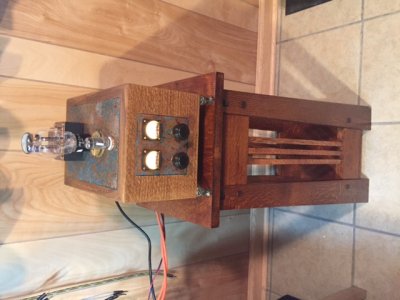
Same with all copper and brass parts. If you search ebay carefully you will find people selling real brass watch parts in a group for very little money. By dumb luck, a vent hole I drilled in the top plate was the perfect size for brass pocket watch parts I found. I also found half inch copper pipe sold as a group, elbows, T's etc. I used those to build a matching headphone rack.

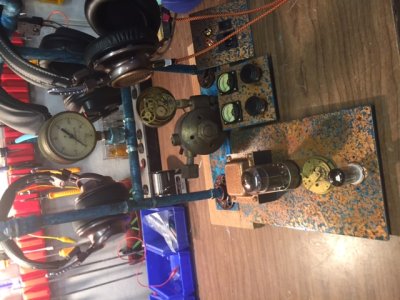
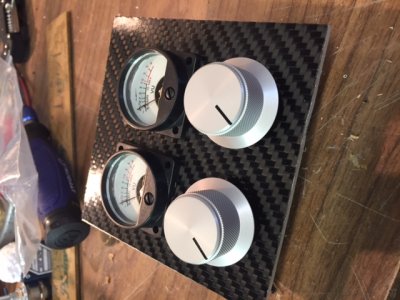
I ordered VU meters from ebay as well as Amazon, they are all the same size, if you watch carefully you can get a set with circuit board for $20. They are 100 to 500 microamp deflection but I had to use current limiting resistors to get proper deflection (around 16k resistors as I recall). I am using dual Alps pots and trust me on some music it is wonderful to turn one channel or the other up a bit more than the other. I used the output to the headphone jack as a source for the meters. As I recalled from some of my electronics theory, normally on a speaker system they are in the last stage before the speakers thus the headphone jack is as close as I can get to that as possible. (headphones being basically tiny speakers)

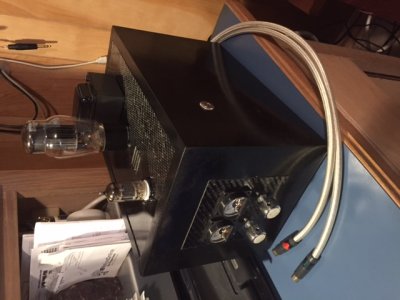
I may show the wiring when I do a more professional build, I rushed through this adding molex connectors and such so I could easily unplug all plates from one another. I am also going to install a speedball upgrade, I have two working amps so I could make certain that none of my changes hurt the overall sound of the amp. Because of the dual volume controls, I totally prefer the modified build so far.

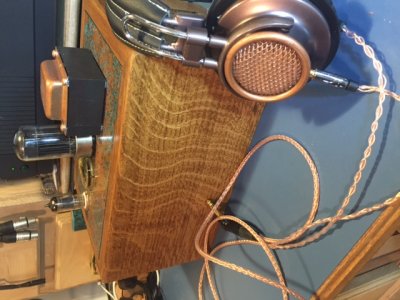
The headphones I am using are modified Beyerdynamics, I added drivers to a set of California headphone company silverado's and turned them from closed to open. The other set is from Darth Beyer, modified DT 770's I believe that are more semi open and are built for bass in my humble opinion. I built all cables and made a set to match using some silver plated braid and ofc center conductor. Others within the setup are Mogami star quad wired as balanced using the shield as it was meant to be used in my opinion.

I apologize if some of this info is redundant.

Tom Stanley    (I believe I am supposed to list any company related affiliation and it is included in previous posts.)
 

Attachments

  • IMG_1802.JPG
    IMG_1802.JPG
    133.4 KB · Views: 62
  • IMG_1801.JPG
    IMG_1801.JPG
    127.1 KB · Views: 48
  • IMG_1799.JPG
    IMG_1799.JPG
    104.9 KB · Views: 62
  • IMG_1985.JPG
    IMG_1985.JPG
    108.6 KB · Views: 64
  • IMG_1981.JPG
    IMG_1981.JPG
    101.4 KB · Views: 76
My latest Crack build, carbon fiber plates. The cabinet will be black lacquer (piano finish). If this is too much black on black I have some ideas to add a bit of contrast.
 

Attachments

  • IMG_2026 (1).JPG
    IMG_2026 (1).JPG
    118.3 KB · Views: 47
  • IMG_2020 (1).JPG
    IMG_2020 (1).JPG
    115.2 KB · Views: 32
  • IMG_2170.JPG
    IMG_2170.JPG
    94.8 KB · Views: 18
Back
Top