Crack - My First Build

Bear

New member
EDIT: just realised I started posting in the wrong thread! Will try and move.

EDIT to the EDIT: Jameson moved it for me before I could even begin looking at how to do that. Superstar.

Logging my first build. All new to me and picking up some skills (and tools) along the way.

Not purporting to be best practice just a record of what I did and the impact it had.
 
Last edited:
IMG_4894.jpegFirst thing I did was paint the chassis plate and transformer bell.

600 grit sandpaper making sure I got into all the nooks and crannies.

Then donned a pair of nitrile gloves to make sure there was no inadvertent transfer of oils from my skin to affect paint adhesion.

Washed everything with dish soap and rinsed thoroughly to remove all detergent residue.

Dried with paper towels then let air dry.

With gloves still on gave everything a once over with some isopropyl alcohol on a lint free rag.

Once the alcohol had evaporated a coat of dulux spray etch primer followed by two coats of dulux self priming spray paint (colour = oakbank, finish = flat).

Made sure not to get any paint on the underside so raw metal is exposed for electrical safety (earthing) as per the instructions.

Lessons learned - ‘well ventilated’ and ‘outdoors’ are a world apart when the etch coat primer is out gassing. Will not use inside ever again! A number of light mist passes is preferable to one heavy pass. Finish on steel bell is slightly less ‘flat’ than on the aluminium chassis plate, but work well IMHO. Let it cure as long as possible and in excess of the guidelines and the adhesion seems to be first class.
 
IMG_4922.jpeg
Glued timber boxing together with some Gorilla wood glue as per the assembly instructions and the glue manufacturer’s instructions. Wipe off excess glue that squeezes out with a damp cloth. Went well and not sure if it’s my imagination but it looked like as the glue cured it pulled the joints tighter and closed up the already pretty tight mitre joints.

Plan on installing some splines at the corners to reinforce the mitre joint. Using some Jarrah to contrast the Elder. Trying to decide what finish to apply, leaning towards beeswax but mind not made up.

Hardware install went well and instructions were super clear and easy to follow.

Lessons learned - when screwing into the 6-lug connector bars support the attachment points with your pliers else as you tighten the screws you twist the supports. I was able to twist them back but lucky I didn’t tear one of them off.

Soldering practice over the next few days then on to the wiring-up.

I might run through the tools I bought and my experiences in future posts.
 

Attachments

  • IMG_4920.jpeg
    IMG_4920.jpeg
    1.6 MB · Views: 12
  • IMG_4918.jpeg
    IMG_4918.jpeg
    2.3 MB · Views: 11
  • IMG_4916.jpeg
    IMG_4916.jpeg
    2.4 MB · Views: 10
  • IMG_4907.jpeg
    IMG_4907.jpeg
    1.1 MB · Views: 10
  • IMG_4904.jpeg
    IMG_4904.jpeg
    1.8 MB · Views: 10
  • IMG_4901.jpeg
    IMG_4901.jpeg
    2.1 MB · Views: 9
Last edited:
EDIT: just realised I started posting in the wrong thread! Will try and move.

Logging my first build. All new to me and picking up some skills (and tools) along the way.

Not purporting to be best practice just a record of what I did and the impact it had.
I moved it for you. Thanks for posting your Crack build!
 
Nice work I really like the color. I recently tried the “Tried and True “ beeswax, a bit more work but I am happy with the results.
 
Nice work I really like the color. I recently tried the “Tried and True “ beeswax, a bit more work but I am happy with the results.
Thanks. I am really happy with how the colour turned out. I found the product to be pretty true to label.

Had a conversation with a guy in my local woodworking shop who recommended a hardwax oil.

Not an immediate decision as I still have to install the splines, but I now have a 3mm chisel so the splines will be done soon (Christmas commitments permitting).
 
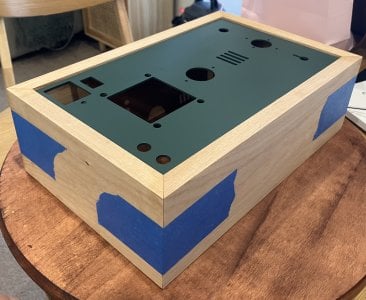
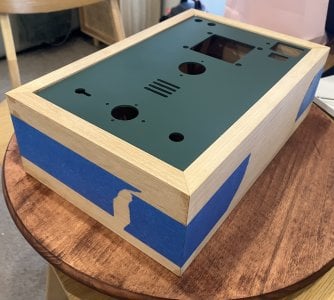
Not an expert but summarising the conversation with the guy in the woodworking shop.

Apparently it’s a product that came out of Germany for the finishing of timber floors but has found uses in woodworking more generally.

https://www.whittlewaxes.com.au/collections/hardwax-oils

The link above takes you to the manufacturer’s page for the product recommended to me. Looking at the sample pieces in store I am leaning towards the matte finish for this project but they all looked good. This particular brand is food safe and low odour whilst curing.

The clear product highlights the grain with minimal darkening of the wood. Soft woods are thirstier than hardwoods, material coverage is about 50% higher than other oils, so easy to over apply and result in needing to wipe off excess to avoid a tacky dust magnet surface. From what I am told, not used it yet.

Stained versions are available if that suits your needs.

It has the benefits of oiling then waxing in a straightforward application process. Brush, roller, rag, or scotch-Brite pad (this method was recommended to me) applied. Light sand between coats.

The oils penetrate the wood and the wax forms a more protective layer at the surface that develops over a week or so as they polymerise. Quite interesting material science if you want to geek out about it.

Like a lot of finishing oils the curing and out-gassing is exothermic so risk of spontaneous combustion of screwed up rags needs to be guarded against with simple precautions.
 
My Crack arrived today. It’s bigger and heavier than I expected. I’m really eager to assemble it and give it a listen.
I am enjoying my build and taking the “there are no medals for fastest build” advice to heart. Which is probably best with the family commitments over the festive period.

I am going to finish my ‘carpentry’ and do a bit more soldering practice before wiring up my Crack.

Best of luck with your build. I’d be interested in your experiences through the process if you have anything you want to share.
 
Chem-Wik from Chemtronics. Vampire Tools Solder Sucker and a few extra tips for your next Bottlehead kit :)

For a finish WATCO Danish Oil One Step Finish.

You off to a Handsome start!
 
Back
Top