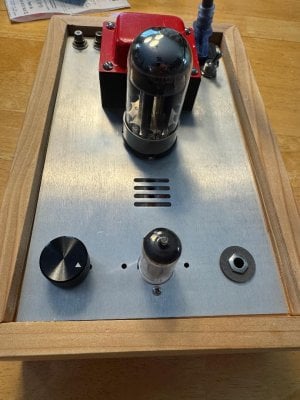
Crack having issues with B3 and B6

justinm

New member
Good evening,

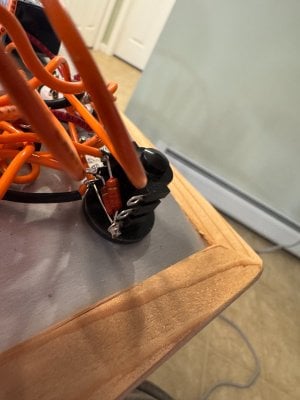
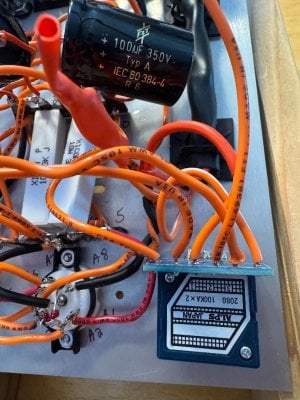
I had built my particular Crack about 10 years ago, I recently upgraded all caps, resistors and an Alps potentiometer. The decision to do this was the OEM pot began to have crackling sounds when moving the volume up and down. Probably just dust.

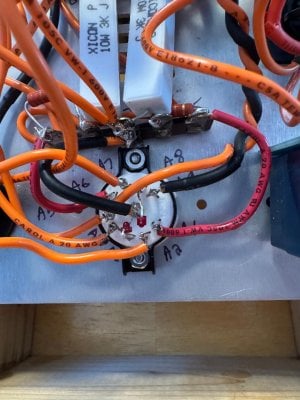
Long story short on the rebuild the terminals B3 and B6 have no voltage at all.

All resistance values check out. I did have a bad ground on terminal three due to paint and an air gap causing a ground issue. This issue resolved now both LED lamps are lit.

I have a new 6080 on its way in the mail, just in case.

Thanks for the help everyone!

Justin-
 
Here are some pictures. Crack 1 build originally back in 2012, then I added the Speedball. Two caps started to bulge, then the oem pot started to crackle. I rebuilt this amp completely. Caps are now axial, I made sure to triple check polarity and I shielded the conductive legs with heat shrink tubing everywhere. I made sure to find the correct specification wire, yes it is all orange. I modified the tricky wiring with black and red heat shrink. I painted some of the "white" wire with a paint pen too. There was a grounding issue with terminal three, that has been corrected, that was an air gap away from the chassis and paint on the tube socket retaining ring. All resistance values are good. Cannot get the 6080 tube to work.
 

Attachments

  • Crack 1.jpg
    Crack 1.jpg
    126.4 KB · Views: 13
  • Crack 2.jpg
    Crack 2.jpg
    966.8 KB · Views: 9
  • Crack 3.jpg
    Crack 3.jpg
    966.8 KB · Views: 9
  • Crack 9.jpg
    Crack 9.jpg
    115.2 KB · Views: 8
  • Crack 8.jpg
    Crack 8.jpg
    139.9 KB · Views: 8
  • Crack 7.jpg
    Crack 7.jpg
    127.8 KB · Views: 7
  • Crack 6.jpg
    Crack 6.jpg
    143.1 KB · Views: 7
  • Crack 5.jpg
    Crack 5.jpg
    153.3 KB · Views: 8
  • Crack 4.jpg
    Crack 4.jpg
    126.8 KB · Views: 8
  • Crack 10.jpg
    Crack 10.jpg
    158.8 KB · Views: 9
It would have been a good idea to come here when you had the Speedball issue initially, as bulging caps would tend to indicate a build issue that could have likely been addressed with a simple visual inspection and/or resoldering. It's also a good idea to build your amp and listen to it before installing the Speedball, which I don't think happened here.

Your 6080 doesn't work because the octal socket wasn't installed into this kit properly.

It would be a very, very, very good idea to get a new hardware, wire, and electronics bag for this, then rebuild it with the correct/reliable parts that we provide.

-PB
The crack worked flawlessly for 13 years, it probably had hundreds of hours on it. That is why the cap died. What is wrong with the octal socket? Speedball kit was damaged when the amp fell a couple of years ago due to an encounter with my dog.
 
The cap died because of how the octal socket is installed. The heater pins on the 8 pin socket shorted the B+ feed to one of the 12AU7 grids, which would pull up the cathode voltage on one half of the 6080 and cause one of the 100uF/160V caps to see way too much voltage (so it bulged and exploded).

The Crack could work under these conditions if you carelessly shoved the 6080 into the socket without any regard for the keyway and you happened to get the right orientation, but eventually your luck will run out.
I will drill out the chassis and rotate the alignment pin to 6 o'clock instead of it's current 9 o'clock position. The caps died on a previous build after working reliably for 12 years. This current frankenstein amp with spaghetti wiring has two new tube sockets and a new build after it broke landing on cement. The different 6080 tube socket has a different chassis orientation and you are right that would alter the pin alignment.

Some caps have a lifespan, I probably got a bad one.

Why would you drill out the chassis? You need to take every wire off the octal socket and mount it properly as described in the manual. There's no drilling required to do this.
 
The tube socket I purchase to repair my broken amp was not correct in its orientation with the alignment post. The mounting holes drilled in the chassis misalign the tube socket. I need to rotate the existing socket due to the screw locations and the mounting ring. I also orders a Beldon socket from tubedepot that has the alignment at the 6 o'clock location instead of the existing 9 o'clock position.
 

Attachments

  • crack socket.jpg
    crack socket.jpg
    5.2 KB · Views: 6
  • Crack 4.jpg
    Crack 4.jpg
    126.8 KB · Views: 6
The brown Belton socket is not the same as the gold socket in your photos.

Both sockets can be oriented properly with the holes we provide that are already drilled in the chassis.

Based on the photo of your build, you need to remove all of the wires on the octal socket you have, move it so that it is properly oriented, put the hardware back on to secure it, then hook the wires back up.

I would suggest reviewing the build manual to see how the socket needs to be oriented, as this may help to clear up some confusion.
 
There's no confusion now, the gold colored trim bezel is exactly 90 degrees off. It is clocked differently and cannot be adjusted. It needs to be moved clockwise when using the current drilled holes in the chassis. The Belton socket has the mounting screws and the alignment protrusion aligned in the the correct orientation to the original octal socket BH used.

I can either use the existing socket I purchased and drill two new holes at 9 o'clock and 3 o'clock or use the new brown Belton socket I purchased from Tubedepot.
 
There are four indentations in the socket that allow you to rotate the gold ring on the socket, so you can install it in any of the four orientations that you'd like. You are just off 90 degrees...
IMG_20251212_131929.jpg
This is the socket you have. Notice that there are four semi-circular indentations in the ceramic body. The socket retaining ring can fit into either set, which gives you the freedom to orient the socket in any one of four different directions. You need to orient this socket with the keyway facing forward.

The Belton socket is not required to accomplish this.
 
The gold colored ring does not fit in the other two dimples. I assumed when using the socket that I was in the correct orientation. It's just defective. I labeled the wires to coincide with the Belden socket once I get the delivery from Tubedepot. Thankfully I didn't see smoke on this rebuild. Tubedepot is also sending me some exciting new vintage tubes and bbq sauce. Thanks for your help.
 
Back
Top