A Crack being built in Sweden

Lugnegard

New member
Good afternoon!

A short introduction of myself: My name is Mikael and I come from Sweden. I love music and even though I don't really like the term audiophile I think it somehow fits me pretty well. I work as an industrial designer/concept artist with my own company.

This will be kind of a build log, where I'll post pictures as I progress with the different steps.

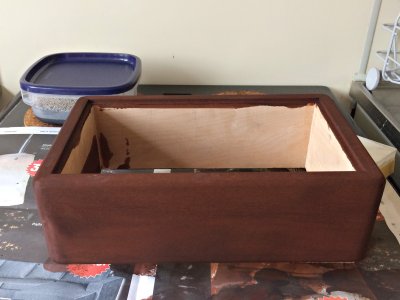
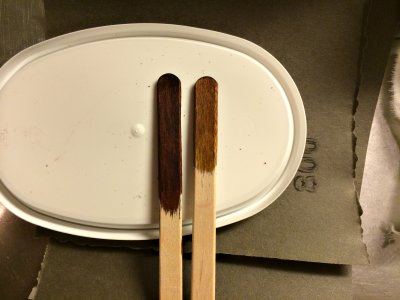
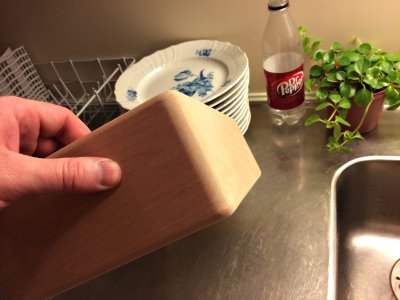
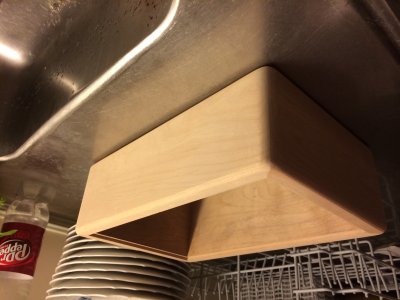
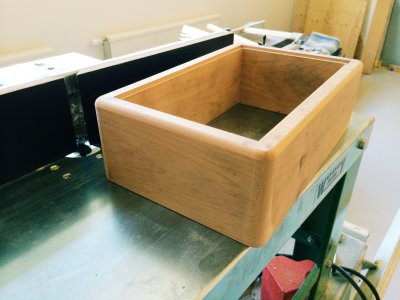
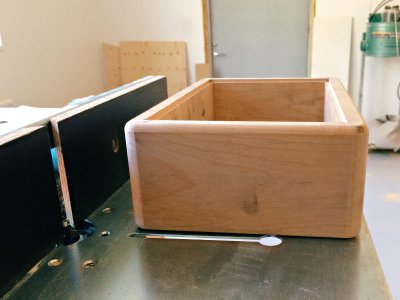
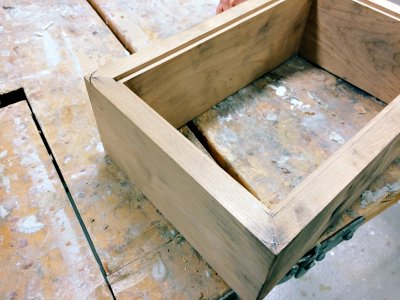
When I decided to get a Crack I knew I wanted to spend some extra time on the enclosure, and do my best to make it "my own". So once the order was placed I started doing a lot of research on wood finishing, wet sanding aluminum and so on. I has a pretty clear idea on what I wanted the finished product to look like. Bottlehead gives us a great canvas to start creating on, and, being an industrial designer, I wasn't going to let this opportunity to pass me by.
I love music and spend a good portion of my day listening to Springsteen, Muddy Waters, KD Lang, Cash, etc. I got a big Apple Lossless library with classical music, christian worship and blues. Of course the device that makes this beautiful the music audiable should look just as good as it sounds. Not more then fair right?

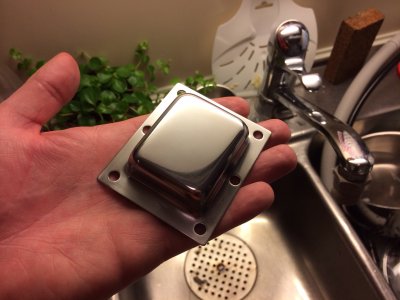
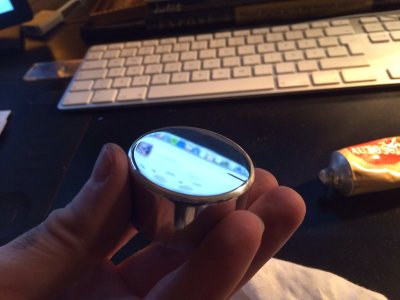
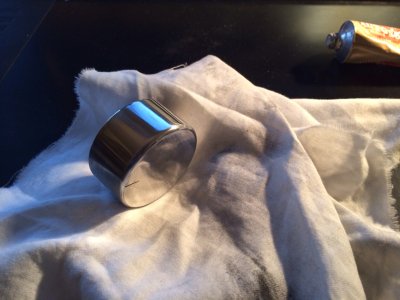
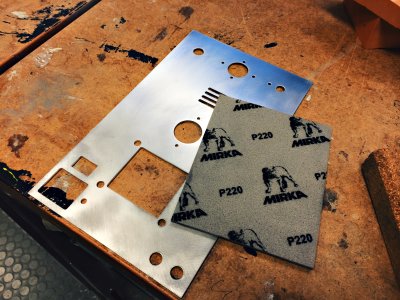
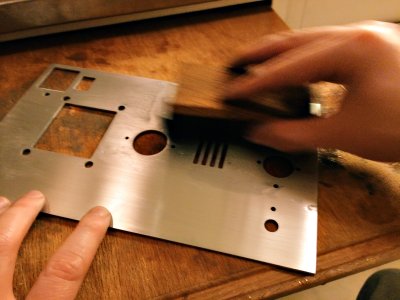
A lot of my clients visit my studio to discuss our design projects, so I definately wanted to push my skills in the wood and metal shop, to make this an item of discusson. The first thing I decided was to aim for a very good finish on the metal chassie. No paint, nu clearcoat. Just as close to a mirror finish I could get without any powertools.
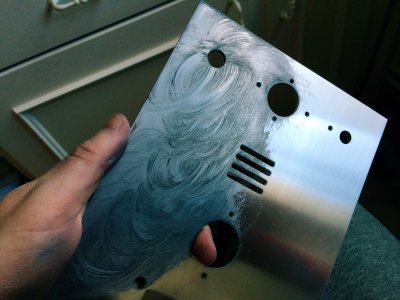
I started wet sanding with 240 paper, then 400, 600, 900 and finally 1200. At first I skipped the 900, but that didn't work out. The scratches from the 400/600 were too deep, and I needed both the 900 & 1200 grit paper the get rid of most of them.

Next up is polishing the aluminum.... We'll see how that goes ;)
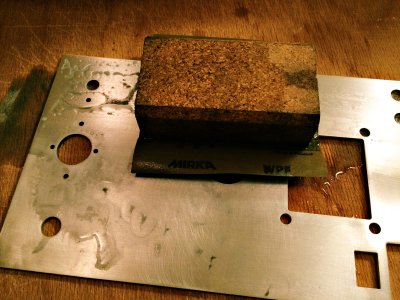
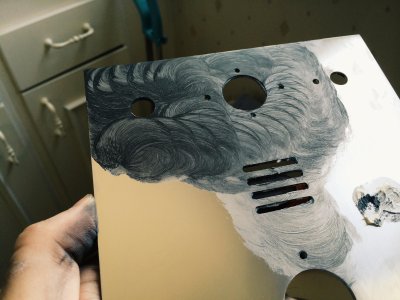
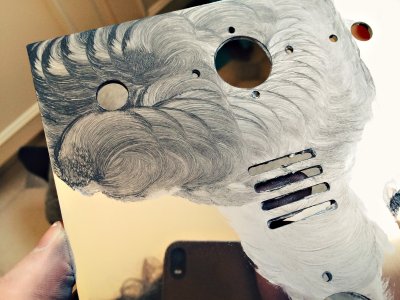
 

Attachments

  • IMG_6635.JPG
    IMG_6635.JPG
    790.9 KB · Views: 329
  • IMG_6641.JPG
    IMG_6641.JPG
    688.2 KB · Views: 305
  • IMG_6642.JPG
    IMG_6642.JPG
    520.2 KB · Views: 293
The polishing process has just begun, but I thought I'd show you a little glimse on the progress.
 

Attachments

  • IMG_6633.JPG
    IMG_6633.JPG
    2 MB · Views: 406
  • IMG_6632.JPG
    IMG_6632.JPG
    838.9 KB · Views: 280
  • IMG_6629.JPG
    IMG_6629.JPG
    648.2 KB · Views: 321
Man, you're lucky that you have access to Mirka's product line.  That would certainly be my first choice for such an undertaking!

-PB
 
Yes, Mirka is great! They are the most common sand paper here in Sweden :) Sadly I'm having trouble finding 1500 & 2000grit which would be necessary for a mirror finish.
 
The top plate is looking good doing it by hand is tough work, I have been giving my Mirka CEROS sander/extractor combo a good work out for most of the day today it would make short work of polishing your plate! 

If you have gone to 1000/1200 grade you could go straight to a course cutting paste compound for removing 1000 grade scratches then use a fine swirl remover or a liquid metal polish like Brasso. 

A tip for getting that perfect mirror finish on the alloy is to use *jewellers rouge* for the final polish. 

Looking forward to learning more of your build.

 
I work pretty late last night on the chassie plate. It is seriously hard to get rid of those 1200grit scratches.
So I took a break from the metal work and started to put the box together. Love working with wood! Love the smell, the touch, the material. Even before I got the kit I decided to router all the edges. If I had access to some more exotic wood like curly maple or some burl I might have gone with 90° angles but the alder could use some extra love (it's a pretty boring species).

After the edges had been routered I did some sanding, starting with 180, then 240. After the 240 I wiped the entire both with a wet piece of cloth to rise the fibers. Once that was dry I sanded it with 320, wet it again and went over with some 400 paper.

When the wet wood was drying I started to mix the stains. I'm using a swedish brand called Herdins. They got a lot of different wood stain products like waxes, laquer and waterbased. I usually go with the water based product, it is very easy to work with.
The color is a auburn/chestnut with a slight tint of red (very very little) that I got by mixing two different brownish colors. Pretty excited to see how it turns out in the end :) !


Attachments

  • IMG_6684.JPG
    IMG_6684.JPG
    840.4 KB · Views: 454
  • IMG_6667.JPG
    IMG_6667.JPG
    439.9 KB · Views: 234
  • IMG_6677.JPG
    IMG_6677.JPG
    397.7 KB · Views: 273
  • IMG_6676.JPG
    IMG_6676.JPG
    1.5 MB · Views: 260
  • IMG_6627.JPG
    IMG_6627.JPG
    476.8 KB · Views: 390
  • IMG_6624.JPG
    IMG_6624.JPG
    468.9 KB · Views: 316
  • IMG_6640.JPG
    IMG_6640.JPG
    542.1 KB · Views: 279
A little update! After I had finished sanding the base with 400 it was pretty much silk smooth. I stained it with a water based chestnut mix, which btw turned out pretty dark, so I did some very minor polishing with a 0000 steel wool.
I've been doing a lot of research when it comes to surface treatment and finishing. Really hard to know what will creates the best finish. I decided to try Tru-oil since pretty much everyone seemed to like it and it would lend itself great for a high finish result. So I got a 3oz bottle (90ml) and applied the first coat yesterday. It was very nice to work with, just put some drops on the wood and go back and forth with your finger in the direction of the woodgrain. Very smooth, no smell and fast! I let it dry for about 15h and put on a second coat which now is drying. Not much to show at the moment I'm afraid.
But I love this process :)
 
Since the Tru-oil nedsättande quite some time to dry up I spent a little time on the volume knob and bell cover. Hopefully I'll get access to a bench mounted polish machine this week so I will get rid of those small, annoying, 1200 scratches.
 

Attachments

  • image.jpg
    image.jpg
    578.9 KB · Views: 402
  • image.jpg
    image.jpg
    616 KB · Views: 296
  • image.jpg
    image.jpg
    558.6 KB · Views: 335
  • image.jpg
    image.jpg
    696 KB · Views: 280
I like the polished bell cover, this going to be nice when its done.  You will have to keep it in a glass case away from greasy fingers :)
 
mcandmar said:
    .  .  .    You will have to keep it in a glass case away from greasy fingers :)

Clear coat will make cleaning very easy. 

I don't know if this is still true but the older Bottlehead transformer end bells would rust if there was no coating on them.
 
Yes, you are right about the bells rusting without any coating. When wet sanding I left the bell wet over night and the next morning it had som rust dots....
Both the chassie and bell will get some clear coat once the finish it done.
 
You can use an image hosting service, then click the lower left button when drafting a post (just above the :) ), which will insert a tag {img} {/img}. (Brackets have been changed so it will appear as text)  If you paste your web URL for the photo between those bracketed tags, it will appear in the body of your post.
 
Paul is saying to use these:[] instead of the ones he used in the example.  It is hard, if he used the right ones they would have disappeared when he posted.
 
A little update
10383773_10152413777703826_1905901043582035494_o.jpg

I've done 6 coats of Tru-oil so far. It gets thick pretty fast, so adding 30-40% mineral spirit really helps out.
135475_10152413777608826_4700851683414011087_o.jpg


I'm totally addicted to this build, so much fun. I've never worked with oils before and it is a great experiance. It's such a soothing process, to hand rub the thick oil and see the grain come to life.
 
I sure didn't know that this aluminum would scratch SO easily. It will be close to impossible to mount all the parts without messing it up  :'(
Perhaps I'll have to paint it after all... That's too bad after all the hours I put into polishing and wet sanding.

What do you think? Do you guys have any suggestion?
I am open to all feedback  :D
 
Back
Top